There’s something almost fulfiling about planting a seed and watching it grow into something beautiful and nourishing. I still remember my first garden—a small patch of tomatoes and basil that I tended with nervous excitement. Half the plants didn’t make it, but the ones that did? They tasted like victory.
If you’ve been dreaming about starting your own garden but feel overwhelmed by where to begin, you’re in the right place. Whether you have a sprawling backyard or just a sunny windowsill, gardening is one of the most rewarding hobbies you can embrace. It connects you with nature, provides fresh food, and offers a peaceful escape from the chaos of daily life—much like other mindful self-care practices that nourish your well-being.
In this guide, I’ll walk you through essential beginner gardening tips that will set you up for success, from choosing the right location to harvesting your first crop. Let’s dig in!
Table of Contents
Key Takeaways
Understanding Your Growing Environment
Before you buy a single seed packet, you need to understand the environment you’re working with. This is one of the most important beginner gardening tips I can share—skipping this step is like trying to bake without knowing if your oven works!
Determine Your Hardiness Zone
Your hardiness zone tells you which plants will thrive in your climate. The USDA Plant Hardiness Zone Map divides North America into zones based on average minimum winter temperatures. You can find your zone with a quick online search of your zip code.
Why does this matter? Because planting tropical flowers in Minnesota or cold-loving lettuce in Arizona is setting yourself up for disappointment. Work with your climate, not against it.
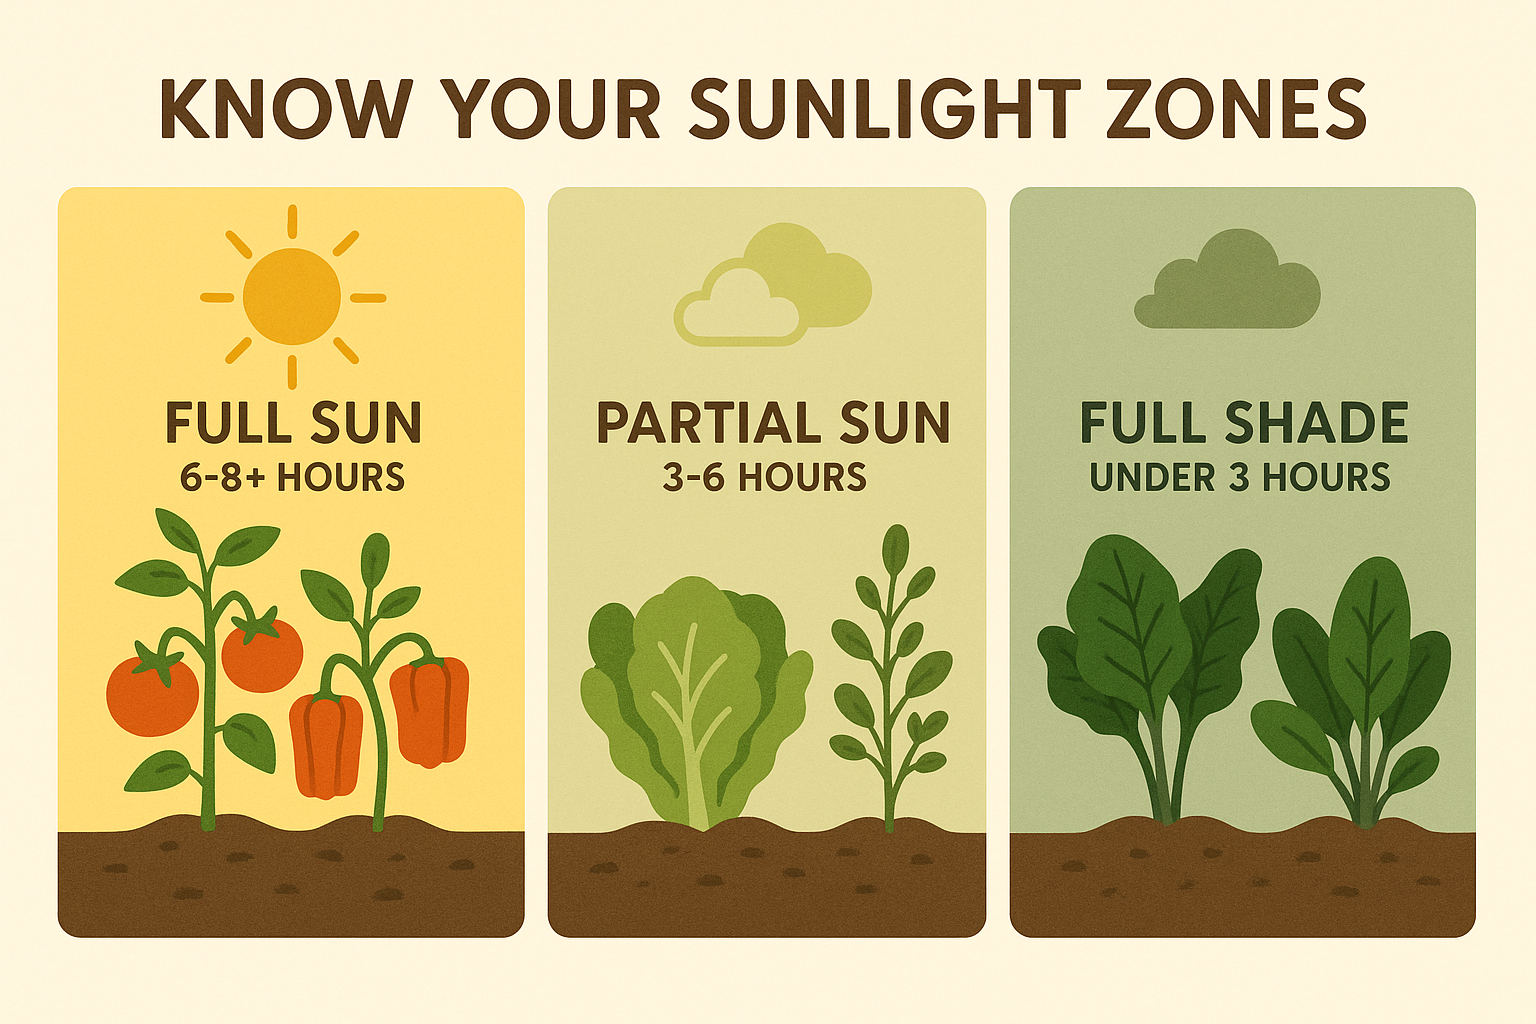
Assess Your Sunlight Situation
Different plants have different light requirements:
Spend a day observing your potential garden space. Note where the sun hits throughout the day. That sunny morning spot might be completely shaded by afternoon—and that changes everything.
Test Your Soil
Healthy soil is the foundation of a successful garden. Before planting, consider getting a soil test from your local extension office (usually $10-20). You’ll learn:
Don’t worry—if your soil isn’t perfect, it can be amended with compost, fertilizers, or other organic matter. Soil improvement is an ongoing process, much like the healthy habits you build over time.
Choosing What to Grow: Start Simple
The biggest mistake new gardeners make? Getting overly ambitious. I’ve been there—buying 15 different seed packets, imagining a garden that would feed my entire neighborhood. Reality check: I couldn’t keep up with the maintenance.
Best Plants for Beginners
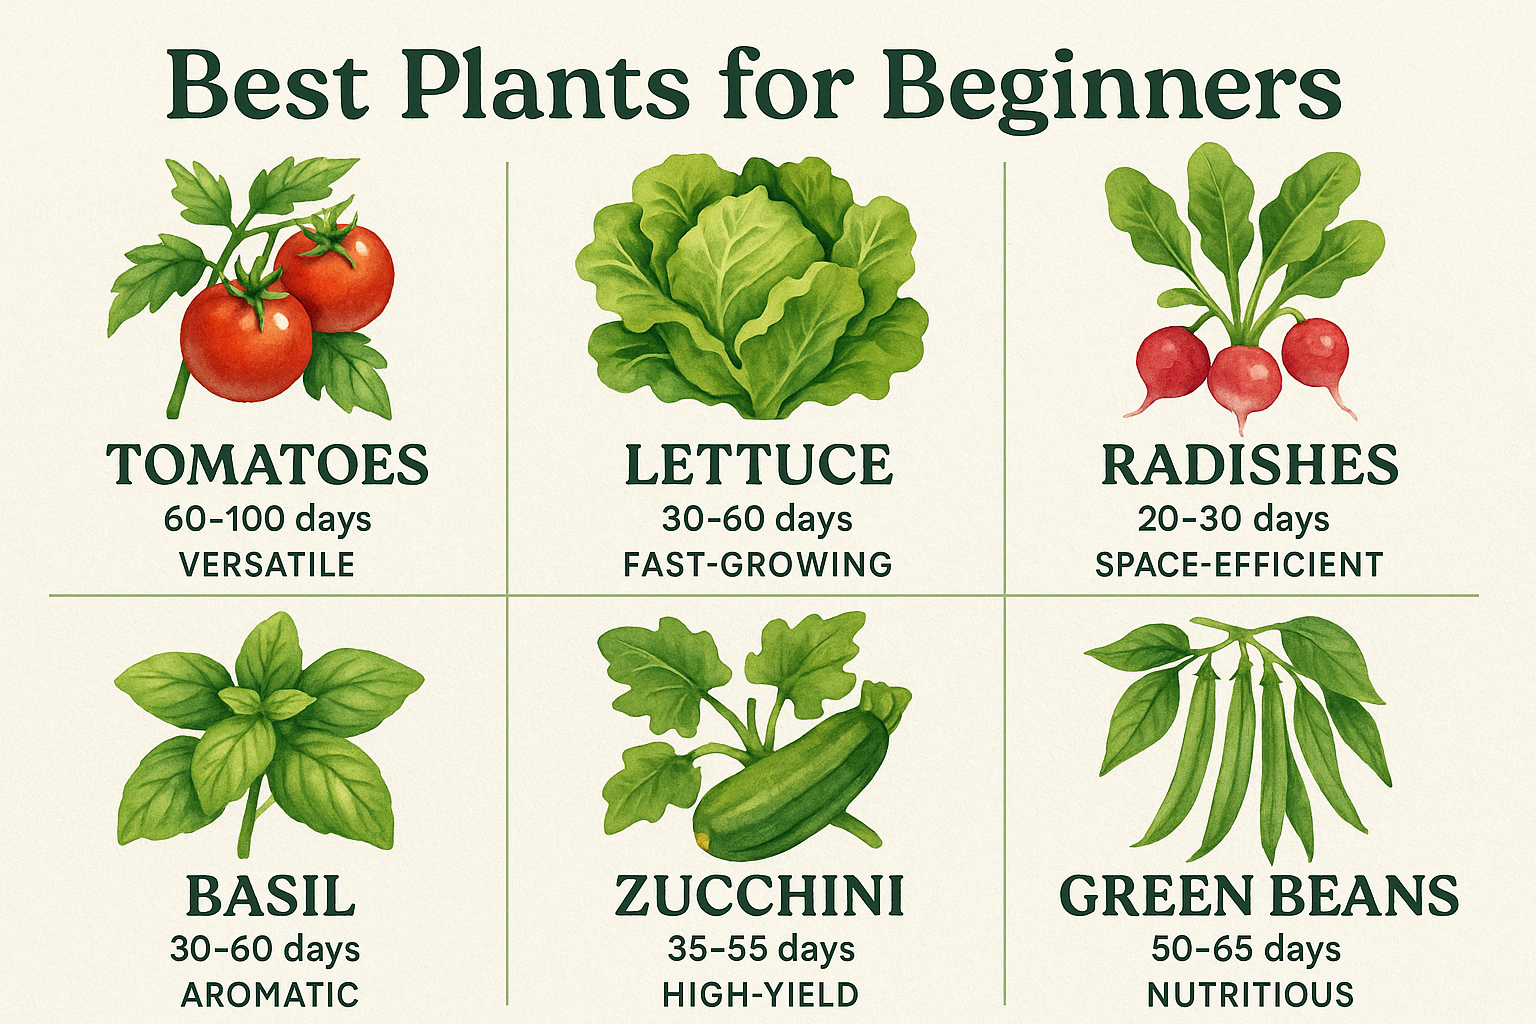
Here are my top recommendations for first-time gardeners:
| Plant | Why It’s Great for Beginners | Growing Time |
|——-|——————————|————–|
| Tomatoes | Forgiving, productive, delicious | 60-85 days |
| Lettuce | Fast-growing, shade-tolerant | 30-45 days |
| Radishes | Quick results boost confidence | 25-30 days |
| Herbs (Basil, Mint) | Hard to kill, useful in cooking | Ongoing |
| Zucchini | Produces abundantly | 45-55 days |
| Green Beans | Easy to grow, kid-friendly | 50-60 days |
Container vs. In-Ground Gardening
Container gardening is perfect if you:
In-ground gardening works well if you:
There’s no wrong choice! I started with containers on my apartment balcony and now have both. Choose what fits your current situation.
Essential Gardening Supplies for Beginners
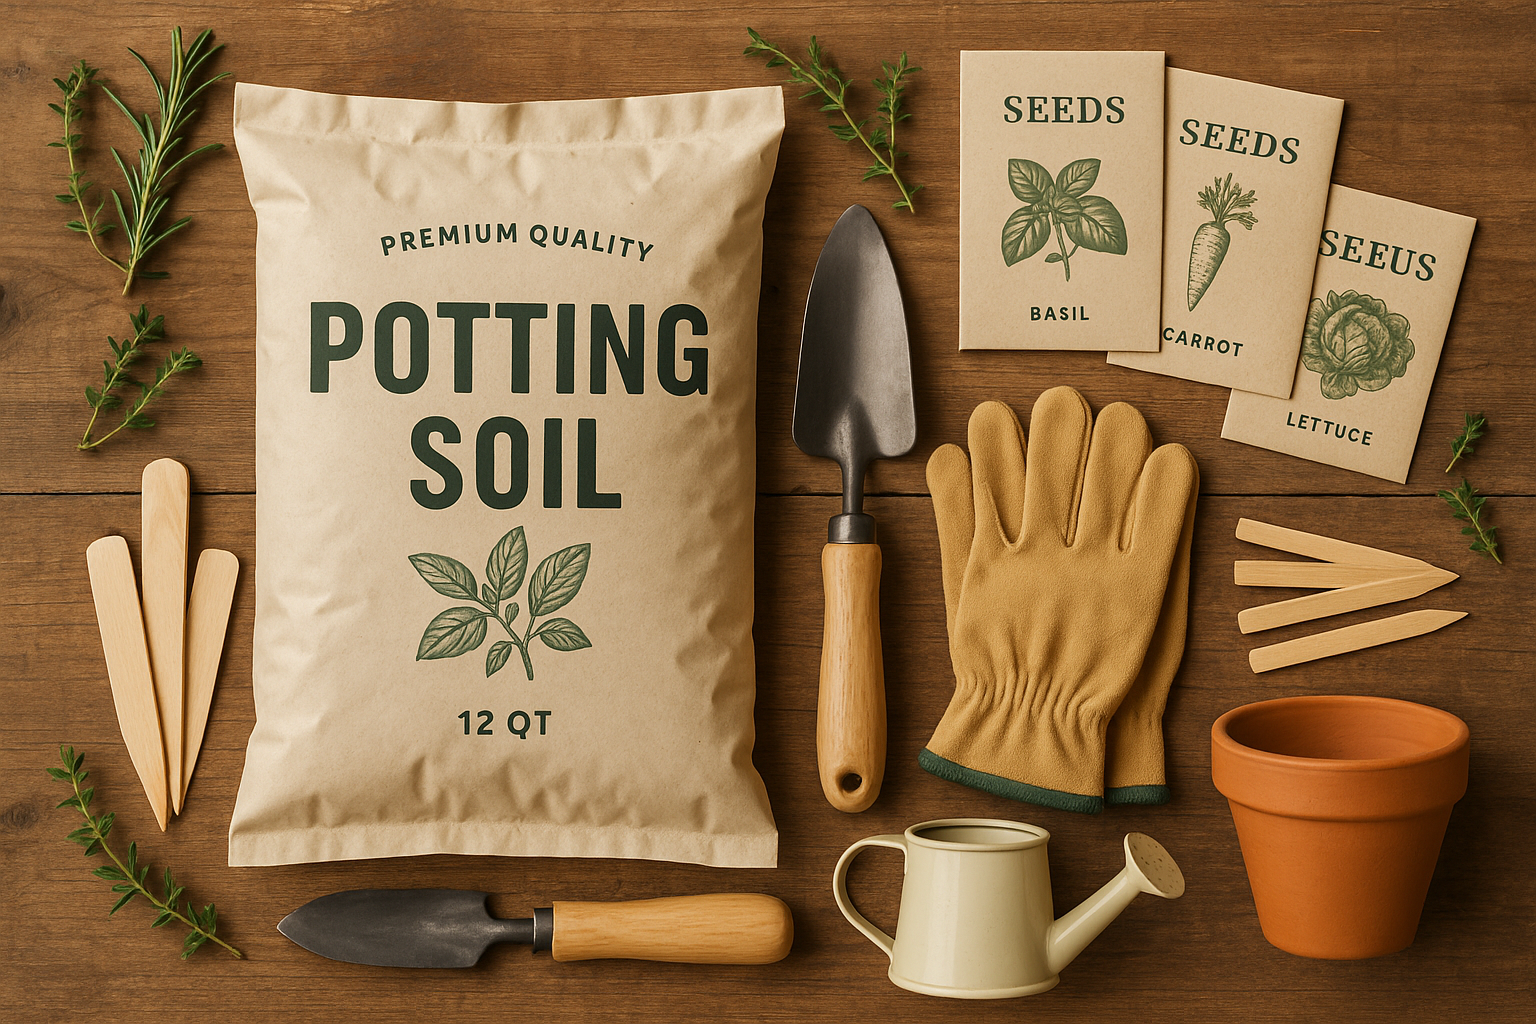
You don’t need to spend hundreds of dollars to start gardening. Here’s what you actually need:
The Basics
✅ Quality potting soil or compost (don’t use dirt from your yard for containers)
✅ Seeds or starter plants (starter plants are more forgiving for beginners)
✅ Containers with drainage holes (if container gardening)
✅ Watering can or hose with a gentle spray setting
✅ Hand trowel for digging and planting
✅ Gardening gloves to protect your hands
✅ Mulch to retain moisture and suppress weeds
Nice to Have (But Not Essential)
Creating a vision board for your garden goals can actually be incredibly motivating! Pin pictures of the garden you want to create, and watch yourself work toward that vision.
Planting Your Garden: Step-by-Step
Now comes the exciting part—actually getting your hands dirty!
Step 1: Prepare Your Space
For in-ground gardens:
For container gardens:
Step 2: Plant at the Right Time
Timing is everything. Check seed packets for:
General timing guidelines:
Step 3: Follow Spacing Guidelines
Overcrowding is a common beginner mistake. Plants need:
Always check the seed packet or plant tag for recommended spacing. When in doubt, give them more room rather than less.
Step 4: Water Thoroughly After Planting
Give your newly planted seeds or transplants a good drink. The soil should be moist but not waterlogged. This helps settle the soil around roots and reduces transplant shock.
Watering Wisdom: Getting It Just Right
Watering seems simple, but it’s where many beginners struggle. Too much? Root rot. Too little? Wilted, stressed plants.
How Much to Water
The golden rule: Water deeply but less frequently. This encourages deep root growth, creating stronger, more drought-resistant plants.
When to Water
Early morning is best because:
Avoid watering in the evening if possible—wet foliage overnight invites fungal diseases.
How to Water
Just like getting better sleep naturally requires consistency and routine, successful watering is about establishing a regular schedule that works for your plants and lifestyle.
Feeding Your Plants: Fertilization Basics
Even the best soil eventually needs replenishing. Plants are constantly absorbing nutrients, and containers especially need regular feeding.
Understanding N-P-K
Fertilizer labels show three numbers (like 10-10-10), representing:
Organic vs. Synthetic Fertilizers
Organic options:
Benefits: Improve soil structure, slow-release nutrients, environmentally friendly
Synthetic options:
Drawback: Don’t improve soil health long-term
I prefer organic fertilizers because they feed the soil ecosystem, not just the plants. Healthy soil = healthy plants = healthy you! Much like choosing gut-healing smoothie recipes that nourish from within, feeding your soil creates lasting health.
Fertilizing Schedule
Weed and Pest Management
Weeds and pests are inevitable, but they don’t have to ruin your garden.
Dealing with Weeds
Prevention is key:
Pro tip: Make weeding part of your mindful routine. Put on some music, get in the zone, and think of it as meditation. It’s actually quite therapeutic—a chance to slow down and connect with your garden.
Common Garden Pests
| Pest | Damage Signs | Organic Solutions |
|——|————–|——————-|
| Aphids | Curled leaves, sticky residue | Spray with water, introduce ladybugs |
| Tomato Hornworms | Large holes in leaves | Hand-pick and remove |
| Slugs/Snails | Irregular holes, slime trails | Beer traps, copper tape |
| Cabbage Worms | Holes in brassica leaves | Row covers, hand-pick |
Integrated Pest Management (IPM)
This approach uses multiple strategies:
Companion planting—growing certain plants together—can naturally repel pests. For example, marigolds deter many insects, while basil planted near tomatoes improves flavor and repels flies.
Maintaining Your Garden Through the Season
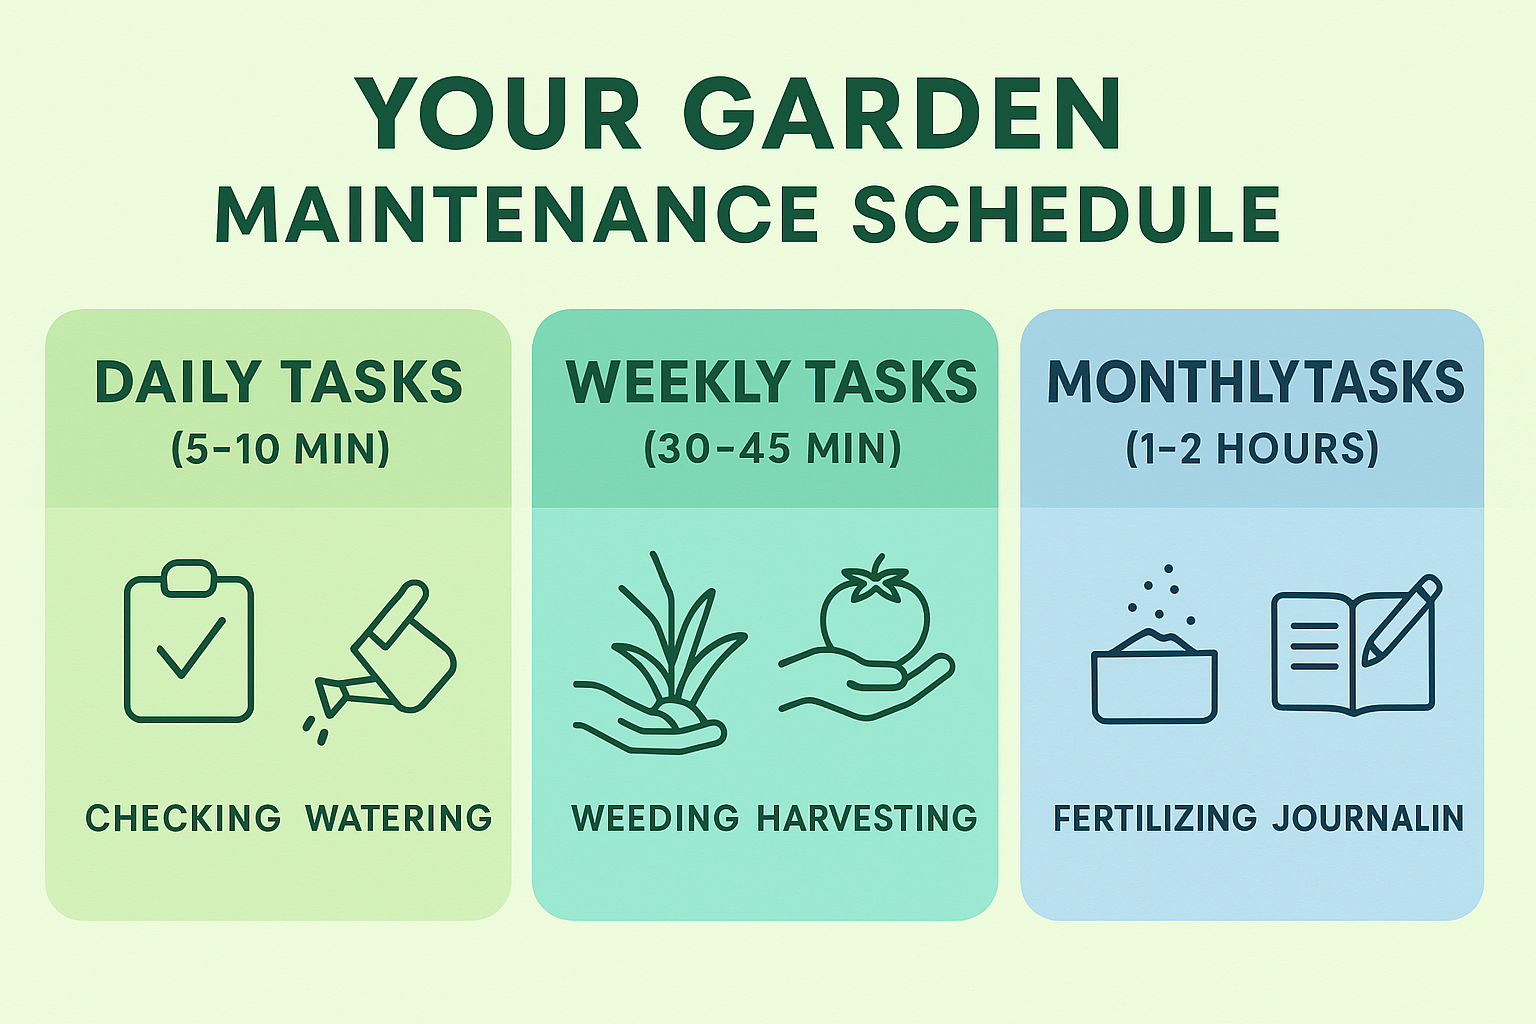
Gardening isn’t “set it and forget it”—it requires ongoing attention. But don’t worry, it becomes a joyful rhythm rather than a chore.
Daily Tasks (5-10 minutes)
Weekly Tasks (30-45 minutes)
Monthly Tasks (1-2 hours)
Keeping a garden journal is one of the best beginner gardening tips I can offer. Note what you planted, when, weather conditions, successes, and failures. This becomes invaluable year after year. It’s similar to using journal prompts for self-growth—tracking your progress helps you learn and improve.
Harvesting Your Hard Work
This is the moment you’ve been waiting for! Here’s how to know when your crops are ready:
Harvesting Guidelines
Tomatoes: Pick when fully colored and slightly soft
Lettuce: Harvest outer leaves or cut entire head when full-sized
Herbs: Snip regularly (encourages bushier growth)
Zucchini: Harvest when 6-8 inches long (smaller = more tender)
Beans: Pick when pods are firm but before seeds bulge
Radishes: Pull when shoulders peek above soil
The “Cut and Come Again” Method
Many plants produce more when harvested regularly:
The more you pick, the more they produce! Don’t let vegetables over-mature on the plant—it signals the plant to stop producing.
Storing Your Harvest
There’s nothing quite like eating food you grew yourself. It’s nourishing in ways that go beyond nutrition—it’s about connection, accomplishment, and romanticizing the everyday moments that make life special.
Common Beginner Gardening Mistakes (And How to Avoid Them)
Let me save you from some painful lessons I learned the hard way:
❌ Starting Too Big
The fix: Begin with 3-5 plant varieties. You can always expand next year.
❌ Planting Too Early
The fix: Wait until after your last frost date for warm-season crops. Patience pays off!
❌ Ignoring Plant Tags
The fix: Actually read the information on seed packets and plant tags. They’re there for a reason!
❌ Overwatering
The fix: Stick your finger in the soil. If the top inch is dry, water. If not, wait.
❌ Giving Up After Failure
The fix: Every dead plant is a lesson. Even experienced gardeners lose plants. It’s part of the process.
“The glory of gardening: hands in the dirt, head in the sun, heart with nature. To nurture a garden is to feed not just the body, but the soul.” – Alfred Austin
Creating a Sustainable Garden Practice
As you develop your gardening skills, consider these sustainable practices:
Composting
Turn kitchen scraps and yard waste into “black gold” for your garden:
Avoid: Meat, dairy, oils, pet waste
Water Conservation
Supporting Pollinators
Creating a garden that supports local ecosystems is incredibly rewarding. You’re not just growing food—you’re creating habitat and contributing to biodiversity.
Preparing for Next Season
As your first growing season winds down, start thinking ahead:
End-of-Season Tasks
Planning for Year Two
Each season builds on the last. You’ll develop intuition, learn your microclimate, and discover what works in your unique space.
Building Your Gardening Community
Gardening doesn’t have to be a solo activity:
The gardening community is incredibly generous and welcoming. Don’t be afraid to ask questions—most gardeners love sharing their knowledge and experiences.
Conclusion: Your Garden Journey Starts Now
Starting your first garden is an act of hope and optimism. You’re planting seeds—literally and figuratively—and trusting that with care and attention, something beautiful will grow.
Remember these essential beginner gardening tips as you begin:
Gardening has taught me patience, resilience, and the profound satisfaction of nurturing something from seed to table. It’s connected me with the seasons, the weather, and the simple miracle of growth. Some days I’m out there celebrating perfect tomatoes; other days I’m mourning plants that didn’t make it. Both are part of the journey.
Your garden is waiting. Those seeds are ready. And you? You’re more prepared than you think.
Now get out there and get growing! Your future self—standing in the garden, sun on your face, hands full of homegrown tomatoes—is going to thank you.


