
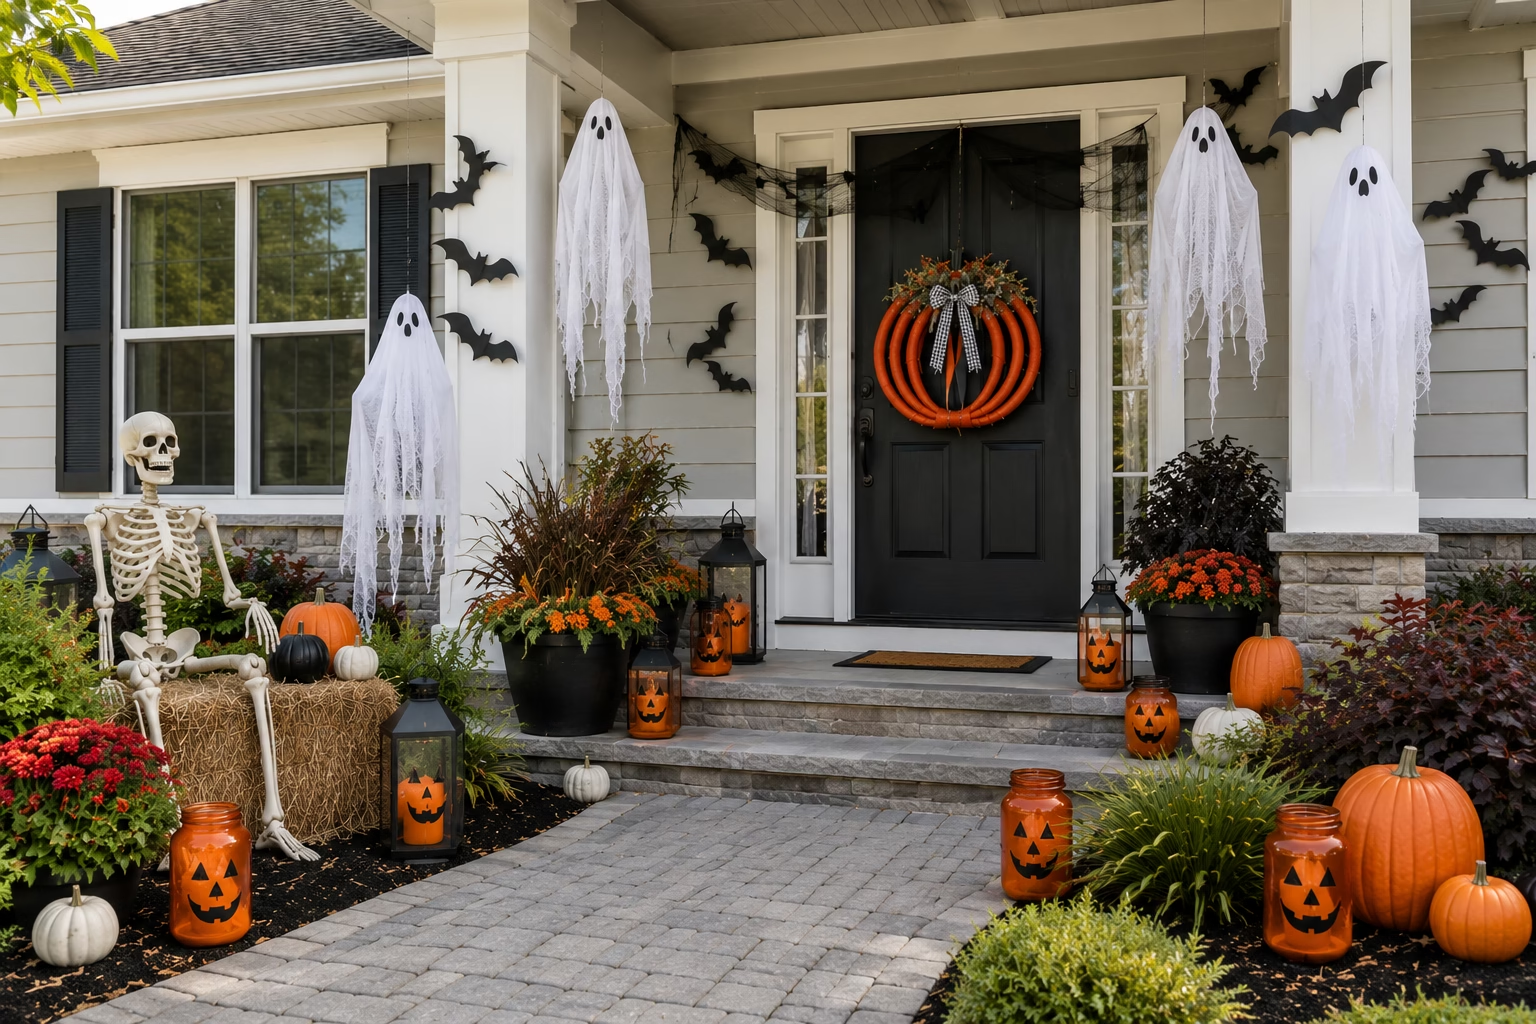
You don’t need to spend a lot of money to make your home feel ready for Halloween. Some of my favorite decorations start with simple supplies from a dollar store or craft shop and a little creativity.
The best part about making your own Halloween decorations is that you can choose the colors, size, and level of spookiness to fit your home. Some projects take only a few minutes, while others can become larger statement pieces for your porch or yard.
In this guide, I’m sharing 13 DIY Halloween decoration ideas for 2026, from floating cheesecloth ghosts and paper bats to skeleton displays, pumpkin decorations, lanterns, and easy outdoor setups.
Quick Answer
DIY Halloween decorations can often be made for $3–$15 per project, depending on the materials you already have and the size of the finished decoration.
Some of the easiest projects include paper bat silhouettes, mason jar pumpkins, bat garlands, and simple pumpkin decorations. If you want something more dramatic, try a caged skeleton display, climbing skeleton, or larger outdoor pumpkin arrangement.
Key Takeaways
- Many DIY Halloween decorations cost less than comparable store-bought pieces.
- Dollar Tree and craft stores carry many of the basic supplies.
- Several projects take less than 30 minutes.
- You can find ideas for both indoor and outdoor spaces.
- Many of these projects are suitable for families, although some require adult-only tools or materials.
- LED candles and string lights can make simple decorations much more dramatic.
- Reusable materials can save money from one Halloween to the next.
- A few statement pieces usually have more impact than overcrowding every area.
Why Make Your Own Halloween Decorations?
Making your own Halloween decor can save money while giving you much more control over the finished look.
Instead of buying decorations that look the same as everyone else’s, you can choose your own colors, change the size, and create pieces that work specifically for your space.
DIY decorations can also become a fun seasonal project for the whole family. Some are simple enough for kids to help with, while others are best handled by adults, who can use hot glue, wire, or other tools.
For more creative decorating inspiration beyond Halloween, check out these DIY home decor ideas.
Basic Supplies You’ll Need

You don’t need a dedicated craft room or a large collection of tools. Many of the projects below use inexpensive materials available at dollar stores or craft shops.
Some useful basics include:
- Black and orange acrylic paint
- Cheesecloth or gauze
- Black construction paper or cardstock
- White balloons
- Mason jars
- Plastic skeletons
- Plastic laundry baskets
- Chicken wire
- Battery-operated LED tea lights
- Hot glue gun
- Black chalk paint
- Twine or fishing line
- Removable adhesive strips
- Scissors
Dollar Tree, Walmart craft sections, and Amazon can cover many of these basics, but you can also repurpose things you already have at home, such as old sheets, jars, cardboard, and wire hangers.
Safety note: Adults should handle hot glue, chicken wire, cutting tools, and other potentially hazardous materials. If children are helping, give them age-appropriate jobs such as painting, arranging, or decorating.
13 DIY Halloween Decorations

These projects range from extremely simple paper decorations to larger outdoor displays. You don’t need to make all 13. Pick a few that fit your space, budget, and crafting experience.
1. Mason Jar Jack-O’-Lanterns
Paint mason jars orange and allow them to dry completely. Then draw jack-o’-lantern faces with black permanent marker or black paint.
Place a battery-operated LED tea light inside and line several jars along a porch railing, windowsill, mantel, or table.
Estimated cost: Under $5 for a set of four.
These are especially nice because they can be stored and reused every Halloween.
2. Cheesecloth Floating Ghosts
Cheesecloth ghosts create one of those classic Halloween looks without requiring a complicated project.
Soak cheesecloth in liquid starch, drape it over a balloon or foam ball, and allow it to dry into a ghost shape. Once it’s dry, remove the form and add simple eyes.
Hang the finished ghosts from a covered porch, ceiling, or suitable tree using fishing line.
Estimated cost: About $3–$6 per ghost.
Because cheesecloth isn’t waterproof, keep these protected from rain or use an appropriate outdoor-safe treatment.
3. Paper Bat Garland
Cut bat shapes from thick black cardstock or craft foam. Fold the wings slightly to give them a three-dimensional appearance, then string the bats together with twine or fishing line.
Hang the garland across a mantel, doorway, window, or staircase.
Estimated cost: Under $3.
This is one of the easiest projects in the article and is a good choice if you want something you can make quickly.
4. Caged Skeleton Display
For a more dramatic outdoor decoration, use a plastic laundry basket as the basic structure and surround it with chicken wire.
Place a plastic skeleton inside and add LED lighting to make the display stand out after dark.
Estimated cost: $10–$15, depending on the size of the skeleton.
This is a project best handled by adults because of the chicken wire and other materials.
5. Creepy Mask Wall
Create an eerie wall display using blank white masks.
Paint or draw different expressions on the masks, then arrange them together on a dark wall to create a creepy gallery effect.
Estimated cost: $5–$10.
For a less frightening version, use silly or ghostly faces instead of realistic horror designs.
6. Batty Balloon Garland
Inflate black, orange, and white balloons in different sizes.
Cut small bat wings from black cardstock and attach them to the black balloons. Then arrange the balloons across a doorway, party table, or wall.
Estimated cost: $5–$8.
This works especially well if you’re decorating for a Halloween party.
7. Pizza Pan Sunflower
This Dollar Tree-style hack can work as a transition piece from fall into Halloween.
Paint a round pizza pan with black chalk paint. Attach wooden clothespins around the edge as petals and paint them yellow or orange.
Add a spider, pumpkin, or skull detail in the center.
Estimated cost: Under $5.
The finished piece can work as Halloween decor while still having enough fall character to use beyond October.
8. Bat Silhouette Wall Art
For one of the easiest wall decorations, cut bats from black construction paper in several sizes.
Arrange them as if they’re flying outward from a corner, doorway, or central point on the wall.
Use removable adhesive strips so you can take them down without damaging the surface.
Estimated cost: About $2.
This is also one of the best projects for beginners because there’s no painting, drying, or complicated assembly.
9. Climbing Skeleton Porch Display

Use zip ties to attach a plastic skeleton to a porch railing or fence.
Position the arms and legs so it looks as though the skeleton is climbing. Add strips of old fabric if you want a more dramatic appearance.
Estimated cost: $8–$12.
A light placed nearby can make the skeleton much more visible after dark.
10. Painted Terracotta Pot Pumpkins

Stack terracotta pots in decreasing sizes, secure them appropriately, and paint the stack orange.
Add a green-painted cork or real twig as the stem.
These can look especially cute on a porch, entryway, or covered outdoor area and can be reused year after year.
For a more detailed tutorial, see this guide on how to paint terracotta pots.
11. Witch Hat Centerpiece
Start with a black witch hat and a wide base. Secure the hat and wrap battery-powered string lights around it.
Add faux spiderwebs or another simple Halloween accent.
It works well as a table centerpiece, mantel decoration, or party decoration.
Estimated cost: $4–$7.
12. Ghost Centerpiece Jars

Fill clear glass jars with water and a small amount of suitable white or glow-in-the-dark paint.
Add a small plastic ghost figurine and secure the lid.
Place the jars on a shelf, table, or mantel as simple Halloween accents.
Estimated cost: $3–$6 per jar.
13. Large Outdoor Pumpkin Display
If you want to make a bigger statement, create an outdoor Halloween scene using multiple pumpkins, skeletons, string lights, and other decorations.
Arrange the pieces in a cluster rather than spreading them randomly across the yard. This makes the display look more intentional.
Estimated cost: Around $20–$50 depending on the size of the display.
You don’t need to recreate a huge professional haunted house. A few large pieces combined with good lighting can create plenty of impact.
How Much Do DIY Halloween Decorations Cost?
One of the biggest advantages of DIY Halloween decorating is the potential savings.
| Decoration | Approx. DIY Cost | Example Store-Bought Cost |
|---|---|---|
| Ghost display | $3–$6 | $18–$30 |
| Skeleton prop | $8–$12 | $25–$40 |
| Pumpkin cluster | $10–$20 | $30–$60 |
| Bat garland | $2–$5 | $12–$20 |
| Mason jar lanterns | $4–$6 | $20–$28 |
These figures come from the original article and are intended as approximate comparisons rather than fixed current retail prices.
If you already have paint, jars, cardboard, fabric, or other supplies at home, your actual DIY cost can be even lower.
Best DIY Halloween Decorations for Outdoor Spaces
Outdoor decorations need to be chosen a little more carefully because they’re exposed to wind, moisture, and greater viewing distance.
From the projects above, good outdoor options include:
- Cheesecloth ghosts on covered areas
- Climbing skeletons
- Large pumpkin displays
- Terracotta pot pumpkins on covered porches
- Caged skeleton displays
For outdoor use, choose sturdy materials and make sure decorations are securely attached.
Paper decorations are better suited to protected areas unless they’ve been appropriately sealed. A waterproof or weather-resistant spray can help protect suitable painted surfaces.
For more ideas that can inspire outdoor seasonal displays, see these budget-friendly outdoor planters.
How to Make Your Halloween Decorations Last
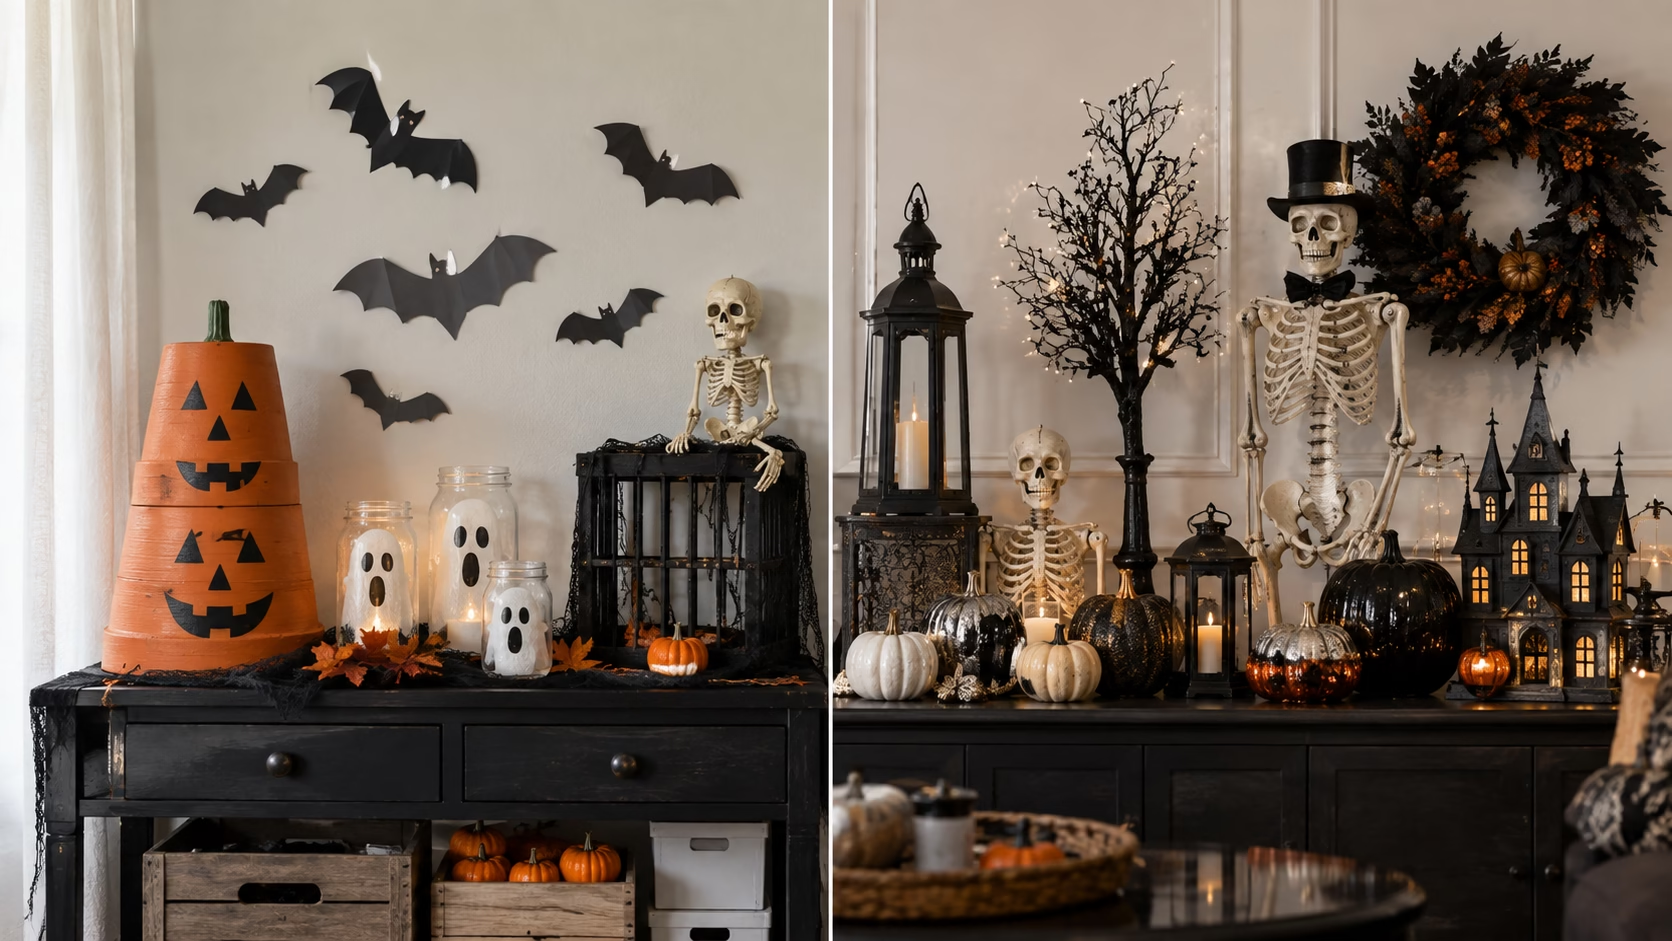
One advantage of DIY decorations is that many can be reused for several seasons if they’re stored properly.
Store Different Materials Correctly
Cheesecloth ghosts:
Wrap them carefully in tissue paper and store them in a sealed container.
Paper bats and other paper decorations:
Keep them flat between sheets of cardboard or in a folder so they don’t become bent.
Terracotta pots:
Store them indoors during freezing weather to reduce the chance of cracking.
Jars and other hard decorations:
Clean and dry them before putting them away.
Labeling your storage bins can also save time when Halloween comes around again.
The original article notes that some well-made DIY decorations can last for several years with proper care, although paper and cheesecloth pieces may need replacing sooner.
If you’re planning a full Halloween crafting day, you can make it even more enjoyable with this chocolate chip pumpkin bread recipe.
Common DIY Halloween Decorating Mistakes
Even simple projects can look disappointing if a few basics are overlooked.
Skipping Surface Preparation
Paint may not adhere well to some surfaces without appropriate preparation or primer.
Using Regular Paper Outdoors
Paper can quickly become damaged by moisture. Use cardstock, suitable protective coatings, or keep paper decorations in sheltered locations.
Overcrowding One Area
You don’t need a decoration on every available surface. A few larger statement pieces can create more impact than dozens of small decorations.
Forgetting Lighting
A decoration that looks great during the day can disappear at night.
LED candles, string lights, or other appropriate lighting can make a huge difference.
Using Hot Glue on the Wrong Surface
Hot glue can damage certain plastics and fabrics. Test a small hidden area first.
Frequently Asked Questions
How much do DIY Halloween decorations typically cost?
Many of the projects in this guide fall between $3 and $15, although larger outdoor displays can cost more.
What’s the easiest DIY Halloween decoration for beginners?
Paper bat silhouettes are among the easiest. You simply cut, arrange, and attach them to a wall using removable adhesive.
Can kids help make these decorations?
Yes, depending on the project. Kids can help with activities such as painting mason jars, making bat garlands, and decorating balloons.
Adults should handle hot glue, chicken wire, cutting tools, and other potentially hazardous materials.
How do I make DIY decorations look more polished?
Use a consistent color palette, keep edges neat, avoid overcrowding, and add appropriate lighting. A clear protective finish can also improve the appearance and durability of suitable projects.
Are cheesecloth ghosts waterproof?
No. They’re better suited to indoor areas or covered porches unless you use materials specifically designed for outdoor exposure.
Where can I find inexpensive Halloween craft supplies?
Dollar Tree carries many of the basic materials used in these projects, while Walmart craft sections and online retailers can fill in anything you can’t find locally.
Conclusion
Making your own Halloween decorations is one of my favorite ways to decorate for the season without spending a fortune.
You don’t need to make all 13 projects. Start with two or three that fit your home and your skill level. A few paper bats or mason jar pumpkins may be all you need for a simple indoor display, while a skeleton, pumpkins, and good lighting can create a much bigger outdoor statement.
I also love that many of these decorations can be reused. With proper storage, your favorite pieces can come back out year after year, making them even more worthwhile.
If you’re decorating more than just the Halloween area, these entryway wall decor ideas can give you more inspiration for seasonal displays, while these DIY home decor ideas can keep the creativity going beyond Halloween.
Choose a few projects, gather your supplies, add some lighting, and make the decorations your own. 🎃


