
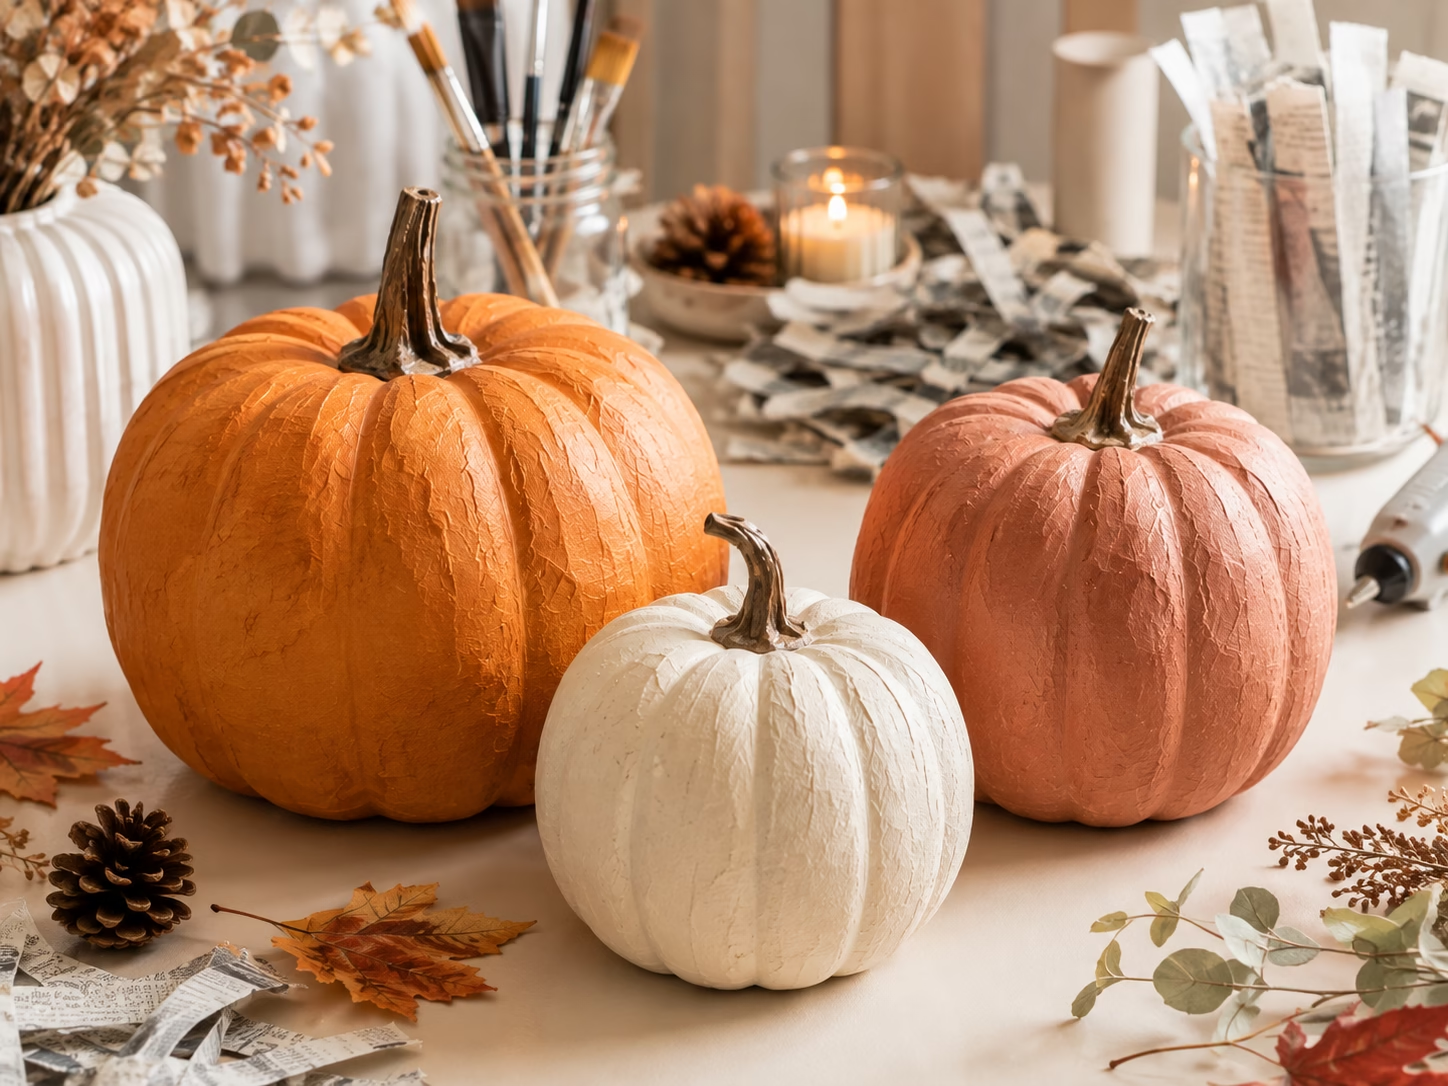
Paper mache pumpkins are one of my favorite fall crafts because they look impressive without requiring expensive supplies. I can make them with a simple balloon, some newspaper, homemade paste, and a little patience.
What I love most is how much room there is to customize them. I can make a classic orange pumpkin, create a set of different sizes, paint one metallic gold, or experiment with patterns and unusual colors. Once the paper mache shell is completely dry, it becomes a lightweight decoration that I can bring out year after year.
The process itself is simple, but patience is important. The pumpkin needs several thin layers, and each layer has to dry completely before I add the next one. From start to finish, I usually allow about 2–3 days, with most of that time spent waiting for the layers to dry.
In this guide, I’ll walk you through everything you need, the easiest molds to use, how to build the pumpkin, how to paint and seal it, and the mistakes I try to avoid.
Quick Answer: To make a papier-mache pumpkin, cover a balloon, stuffed plastic bag, or another rounded mold with strips of newspaper dipped in paste. Build up at least three layers, allowing each layer to dry completely before adding another. Once the shell is completely dry, remove the mold, add a stem, paint the pumpkin, and seal it.
The active work is fairly simple, but the complete project takes about 2–3 days because the layers need plenty of drying time.
Key Takeaways
- A balloon is the easiest mold for beginners, but stuffed plastic bags and other rounded forms can also work.
- Flour paste, PVA glue, or Mod Podge can be used as the adhesive.
- Tear newspaper into narrow strips rather than cutting it for smoother coverage.
- Three layers is a minimum; four or five layers create a stronger pumpkin.
- Let every layer dry completely before adding another.
- Acrylic paint works well for decorating the finished pumpkin.
- A clear sealer helps protect the finished surface.
- Paper mache is best for indoor fall décor because it is not naturally waterproof.
- Cracking is usually caused by thick layers, uneven drying, or removing the mold too soon.
What You’ll Need

The great thing about paper mache is that most of the supplies are inexpensive and easy to find.
Choose a Mold
You have several options:
- Round balloon: My favorite option for beginners because it’s easy to shape and remove.
- Stuffed plastic grocery bag: A good budget option that can be shaped with twine to create pumpkin ridges.
- Foam pumpkin: Useful when you want to add a paper mache surface without removing the base afterward.
- Real pumpkin: Can be used as a temporary form if you want to preserve its shape, although you’ll need to prepare the surface carefully.
- Crumpled newspaper: A completely homemade option that lets you shape the pumpkin by hand.
For my first pumpkin, I’d choose a 9–11 inch round balloon. It produces a manageable medium-sized pumpkin and gives you plenty of room to practice.
Choose Your Paste
You don’t need to use one specific recipe.
Flour paste:
Whisk about 1 cup of flour with 1–1.5 cups of warm water until smooth and lump-free.
PVA glue mixture:
Mix equal parts white school glue and water. This is a useful option if you live somewhere humid because it is more mold-resistant than flour paste.
Mod Podge:
Use it directly from the bottle or dilute it slightly if needed. It can give the finished surface a smoother appearance.
Paper
Newspaper is my first choice because it’s thin, absorbent, inexpensive, and easy to work with.
Tear the newspaper into strips approximately 1 inch wide and 4–6 inches long. I prefer tearing rather than cutting because the softer edges blend together more naturally.
You can also use brown paper bags, tissue paper, paper towels, or plain printer paper if you don’t have newspaper.
Other Supplies
You’ll also need:
- Acrylic paint
- Paintbrushes
- Clear varnish or Mod Podge
- Cardboard tube or twig for the stem
- Scissors
- Twine or yarn
- Bowl for mixing paste
- Protective table covering
For even more fall activity ideas, our 30 Fall Bucket List Ideas For A Happy Season is full of seasonal inspiration.
How to Make a Paper Mache Pumpkin
The process is straightforward. The most important thing is not rushing the drying stages.
Step 1: Prepare the Mold

If you’re using a balloon, inflate it to the size you want and tie it securely.
To create pumpkin ridges, wrap twine around the balloon vertically in about 4–6 sections. Don’t pull so tightly that the balloon loses its shape.
If you’re using a plastic bag, stuff it firmly and tie it closed. Then wrap twine around it vertically to create ridges.
Step 2: Mix the Paste
Prepare your chosen paste in a bowl.
The consistency should be thin enough to coat the newspaper but not so watery that the strips become completely saturated and fall apart.
If you’re using flour paste, whisk thoroughly to remove lumps.
Step 3: Apply the First Layer

Dip one newspaper strip into the paste.
Run the strip between two fingers to remove excess paste, then place it over the mold.
Smooth it down gently and overlap the next strip slightly.
Continue until the entire pumpkin is covered, leaving a small opening around the bottom if you’re using a balloon that will later need to be removed.
Don’t worry about making the first layer perfectly smooth. The important thing is getting even coverage without creating thick areas.
Step 4: Let the First Layer Dry Completely
This is the part I never rush.
Allow the first layer to dry for at least 4–6 hours in a warm, dry room, although overnight is even better.
If the inside is still damp, adding another layer can trap moisture and increase the risk of cracking or mold.
A fan on a gentle setting can help air circulate, but I avoid using high heat to force the pumpkin dry.
Step 5: Add More Layers

Repeat the process until you have at least three complete layers.
For a stronger pumpkin, I prefer four or five layers.
Allow the pumpkin to dry completely between every layer.
Thin strips and thin applications of paste are much easier to work with than thick layers. They also dry more evenly.
Step 6: Remove the Mold
Wait until the final layer is completely dry—not just dry on the surface.
If you’re using a balloon, carefully pop it with a pin and allow it to deflate before removing it from the shell.
If you’re using a stuffed plastic bag, make a small opening and carefully pull the bag out.
If the shell feels soft or bends easily, give it more drying time.

Step 7: Add the Stem
For a simple stem, use a short cardboard tube or a small twig.
Attach it to the top with hot glue or additional paper mache strips.
I like using a real twig when I want the finished pumpkin to look more natural.
Painting and Decorating Your Paper Mache Pumpkin
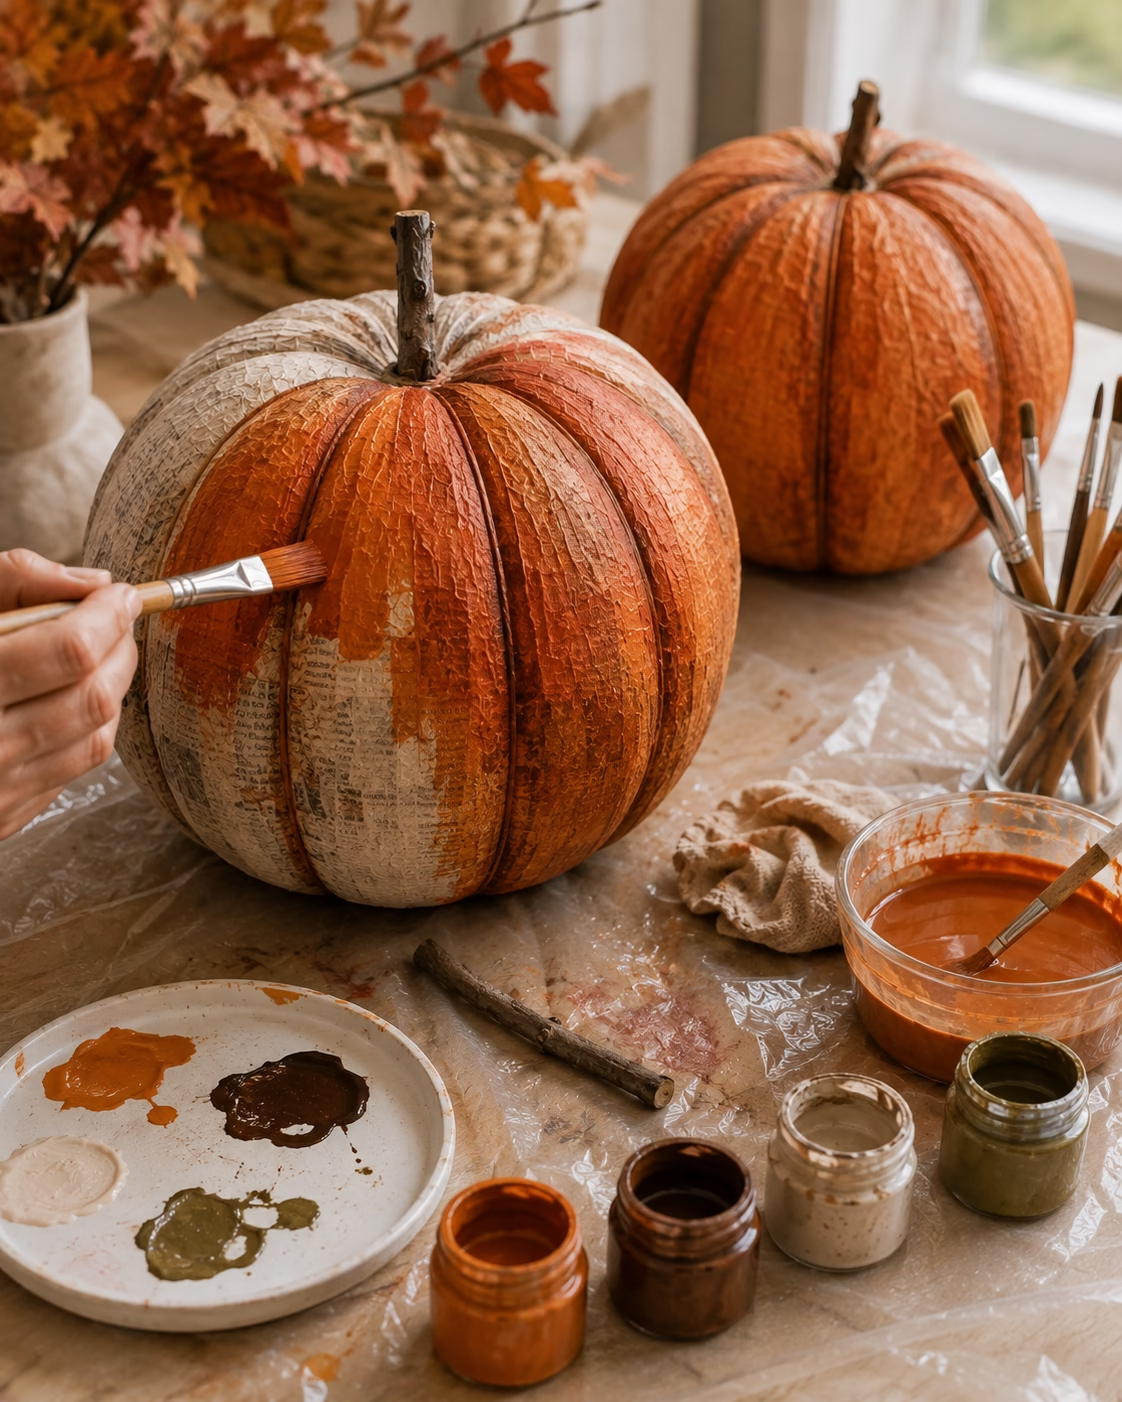
Once the shell is completely dry, the fun part begins.
Paint the Base
Acrylic paint is my favorite choice because it dries quickly and gives me plenty of color options.
For a traditional pumpkin, start with two thin coats of orange rather than one heavy coat.
Allow each coat to dry before adding another.
If you want a brighter finish, apply a white gesso or primer first.
Add Dimension
A completely flat orange pumpkin can look a little plain, so I like adding darker burnt orange or brown around the ridges.
You can also experiment with:
- Metallic gold
- Cream
- White
- Deep green
- Burgundy
- Black
- Rust
- Glitter
You don’t have to stick with traditional orange. A set of pumpkins in different colors can make a beautiful fall display.
Create Different Styles
Some of my favorite ideas include:
Classic Jack-o’-Lantern
Paint the pumpkin orange and add a jack-o’-lantern face instead of carving it.
Glam Pumpkin
Use metallic gold or rose-gold paint and add subtle glitter for a more decorative look.
Stacked Pumpkin Tower
Make three pumpkins in different sizes and stack them together for a larger fall display.
Patterned Pumpkin
Use painter’s tape to create stripes, checks, or geometric patterns before painting.
Glow Pumpkin
For a decorative light, create an opening underneath and use a battery-operated tea light rather than an open flame.
How to Seal a Paper Mache Pumpkin

Sealing is an important final step because paper mache absorbs moisture.
I always wait until the paint is completely dry before applying a sealer.
Mod Podge
Brush on two or three thin coats, allowing each coat to dry completely. You can choose matte or gloss depending on the finish you want.
Clear Acrylic Spray Varnish
This can provide a smooth, even finish. Use it according to the product directions in a properly ventilated area.
Polyurethane
This is a more durable option for pumpkins you plan to keep for several seasons.
A sealed pumpkin will be more resistant to humidity and everyday handling, but sealing does not make paper mache completely waterproof.
Can Paper Mache Pumpkins Go Outside?
I recommend using paper mache pumpkins primarily as indoor decorations.
Even when sealed, paper mache isn’t completely waterproof. Light humidity may not cause an immediate problem, but rain, dew, and prolonged moisture can eventually soften or damage the paper shell.
If you want to display one outside briefly, keep it under a covered porch or overhang and bring it inside if rain is expected.
For permanent outdoor décor, foam, resin, ceramic, or other weather-resistant materials are a better choice.
Paper Mache Pumpkins for Kids
This is one of the fall crafts I enjoy doing with children because the process is hands-on and doesn’t require complicated crafting skills.
Younger children can help tear newspaper, dip strips into paste, and smooth them onto the mold.
Older children can take on more of the layering process with supervision.
Tips for Crafting With Kids
- Cover the work surface before starting.
- Keep the paste and newspaper strips within easy reach.
- Expect some mess.
- Let the pumpkin dry between sessions.
- Allow children to choose their own paint colors.
- Have an adult handle hot glue and any products requiring extra care.
I especially like making this a multi-day activity because children can see the pumpkin become stronger and more recognizable with every layer.
This craft also pairs well with other kids’ activities. Our list of Summer Crafts And DIY Ideas For Kids has more hands-on projects your family will love year-round.
Common Problems and How to Fix Them
Most paper mache problems are easy to prevent once you know what causes them.
Cracking
Cracks usually happen when layers dry unevenly, the strips are too thick, or the pumpkin is removed from its mold too early.
To repair a crack:
- Tear a few tiny pieces of newspaper or tissue paper.
- Apply a small amount of paste.
- Press the pieces into the crack.
- Smooth the area.
- Let it dry completely.
- Sand lightly if needed.
- Repaint and reseal.
Mold or Soft Spots
This usually means moisture has been trapped between layers.
The best prevention is simple: let every layer dry completely before adding another.
If you live in a humid climate, PVA glue can be a better choice than flour paste.
Bumpy Surface
Very wide strips don’t conform well to curved surfaces.
Use narrower strips and overlap them gradually. You can also smooth the surface gently with your fingers while the paper is still wet.
Paste Takes Too Long to Dry
Thick paste and heavy layers both slow drying.
Keep the paste relatively thin, use smaller amounts, and allow plenty of air circulation around the pumpkin.
Avoid high heat because it can dry the outside faster than the inside and increase cracking.
Frequently Asked Questions
How many layers of paper mache do I need?
Three layers is a reasonable minimum for a sturdy pumpkin. I prefer four or five layers when I want a stronger piece that I can reuse for several seasons.
Can I use white glue instead of flour paste?
Yes. A mixture of equal parts white PVA glue and water can be used as the adhesive and is more mold-resistant than flour paste.
How do I make realistic pumpkin ridges?
Wrap twine or yarn vertically around the balloon or stuffed bag before applying the paper mache. The paper will follow those raised lines and create natural-looking ridges.
What size balloon should I use?
A 9–11 inch round balloon is a good starting point for a medium pumpkin. Larger balloons can be used for statement pieces, but they may need additional layers for stability.
Can I make paper mache pumpkins without newspaper?
Yes. Brown paper bags, tissue paper, paper towels, and plain printer paper can all work. Newspaper is simply one of the easiest materials to use.
Can I use a hair dryer to dry the pumpkin?
If necessary, use only a low or cool setting. High heat can dry the outer layer while leaving moisture trapped inside, which can lead to cracking. Natural air drying is the safer option.
How should I store paper mache pumpkins?
Keep them in a cool, dry place. A cardboard box lined with tissue paper works well. I avoid sealed plastic bags because they can trap humidity.
Conclusion
Paper mache pumpkins are one of those crafts that look much more complicated than they actually are. With a simple mold, torn newspaper, paste, and a little patience, I can create beautiful fall decorations for very little money.
The biggest lesson I’ve learned is that drying time matters just as much as the paper mache itself. Thin layers, complete drying between coats, and a good final sealer are what turn a fragile craft into a sturdy seasonal decoration.
If you’re making one for the first time, I’d start with a medium balloon and four layers. Once you’ve got the basic process down, you can experiment with different shapes, colors, patterns, and sizes.
And don’t be afraid to move beyond traditional orange. Metallic pumpkins, patterned designs, white pumpkins, and stacked displays can make your paper mache creations feel unique.
Please grab a newspaper, choose your mold, and give it a try. You may be surprised by how beautiful a few simple household supplies can become. 🎃


