
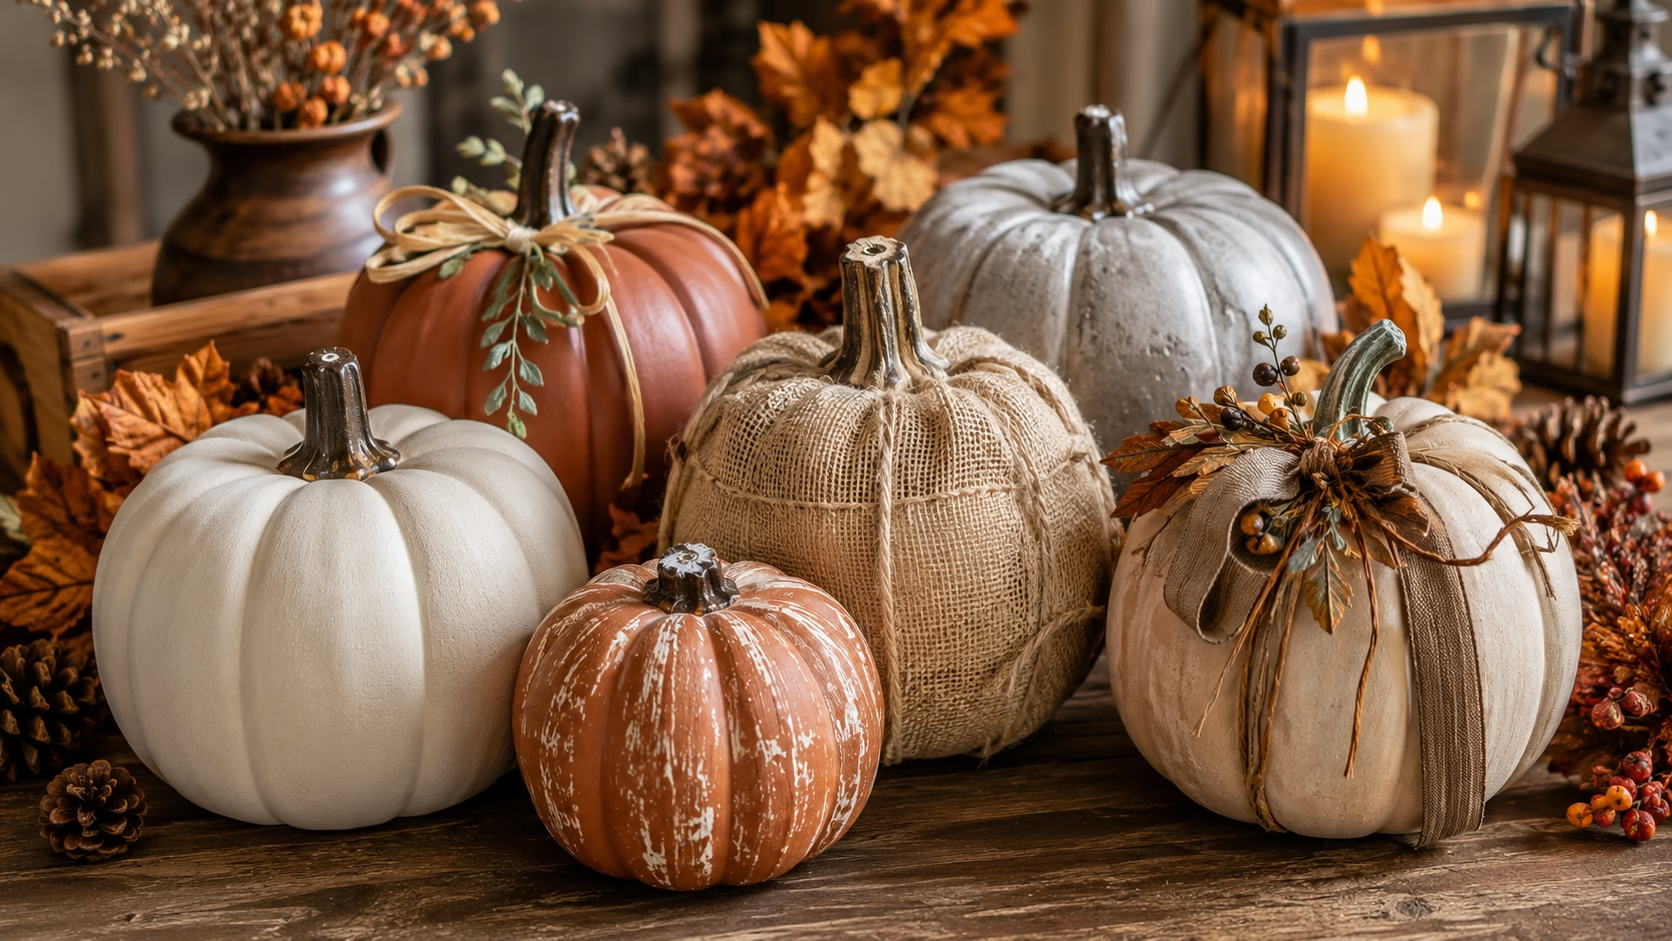
I love fall decorating, but I don’t always want to spend a lot of money on seasonal décor. One of my favorite budget-friendly projects is giving inexpensive plastic pumpkins a complete makeover.
With a little paint, texture, fabric, or ribbon, a plain shiny pumpkin can look surprisingly stylish. I’ve found that the biggest difference usually comes from the finish. A matte surface, subtle color variation, realistic texture, and a few thoughtful details can make a cheap plastic pumpkin look much more like a decorative piece from a boutique.
The best part is that you don’t need advanced crafting skills. Some makeovers take less than an hour, while more detailed finishes may take an afternoon plus drying time. You can also skip paint completely and use burlap, ribbon, twine, fabric, or stickers.
In this guide, I’ll show you the materials and techniques I would use to transform plastic pumpkins, from simple beginner ideas to realistic faux concrete and terra-cotta finishes.
Quick Answer: A plastic pumpkin makeover transforms an inexpensive plastic pumpkin into a more realistic and stylish fall decoration using paint, texture, fabric, ribbon, or other simple craft supplies. Most projects cost under $10 and take about one to three hours of active work, plus drying time.
For the best painted results, I recommend using a plastic-bonding primer followed by chalk paint, acrylic craft paint, or spray paint made for plastic. If you don’t want to paint, you can wrap the pumpkin with burlap, ribbon, twine, or fabric instead.
Key Takeaways
- A plastic-bonding primer helps paint adhere to smooth plastic surfaces.
- Chalk paint is a convenient option when you want a simple matte finish.
- Acrylic paint works well when used over primer.
- Spray paint formulated for plastic provides fast, even coverage.
- Mod Podge is useful for fabric, tissue paper, and other decoupage makeovers.
- Texture and color variation are the keys to making plastic pumpkins look more realistic.
- No-paint techniques are a good option for quick projects and kid-friendly decorating.
- A clear sealer can help protect your finished pumpkin from wear and moisture.
What You’ll Need
The exact supplies depend on the makeover you’re planning, but I like having a basic collection ready before I start.

Basic Supplies
- Plastic pumpkin
- Plastic-bonding primer
- Chalk paint or acrylic craft paint
- Plastic-safe spray paint
- Paintbrushes
- 220-grit sandpaper
- Clear matte or gloss sealer
- Hot glue gun and glue sticks
- Mod Podge
- Burlap, ribbon, twine, or fabric
- Decorative embellishments
For textured finishes, you may also want spackle, a palette knife, baking soda, or dried natural materials.
Before painting, I clean the pumpkin and lightly sand the surface. This gives the primer a better surface to grip.
Choosing Paint and Primer for Plastic Pumpkins

The right paint makes a huge difference because plastic is smooth and nonporous. If the paint can’t bond properly, it can peel or chip soon after you’ve finished the project.
Do You Need Primer?
I strongly recommend primer when you’re using regular acrylic craft paint or standard paint on a smooth plastic pumpkin.
A plastic-bonding primer, also called adhesion primer, is designed to grip plastic and create a surface that your paint can adhere to. I prefer a light coat rather than applying too much at once.
A quick sanding with 220-grit sandpaper before priming can also help the primer bond better.
If you’re using chalk paint or a product specifically designed to adhere to plastic, you may be able to skip a separate primer. I would still test the paint on a small area first.
Best Paint Options
The three options I would consider first are chalk paint, acrylic craft paint, and plastic-safe spray paint.
| Paint Type | Best For | Primer |
|---|---|---|
| Chalk paint | Matte, rustic finishes | Often not needed |
| Acrylic craft paint | Most DIY designs | Recommended |
| Plastic spray paint | Smooth, even coverage | Depends on product |
| Fabric paint | Soft, flexible finishes | Depends on product |
I like chalk paint when I want a quick farmhouse-style finish. Acrylic paint gives me more control over details and color. Spray paint is especially useful when I want a smooth finish without visible brush strokes.
Paints I Would Avoid
I wouldn’t use standard latex wall paint for this project because it isn’t designed for smooth, flexible plastic. Oil-based paint can also be inconvenient because it takes longer to dry and may not adhere as well.
Nail polish may look interesting for tiny decorative details, but I wouldn’t rely on it as the main finish.
Can You Use Spray Paint?
Yes. Spray paint made specifically for plastic can be one of the quickest ways to cover a plastic pumpkin.
I apply thin, even coats rather than trying to get complete coverage in one pass. Multiple light coats generally give me a smoother result and reduce the chance of drips.
Always follow the directions on the particular spray paint you’re using, especially regarding ventilation, drying time, and whether primer is required.
Plastic Pumpkin Makeover Ideas

This is where I have the most fun because there are so many ways to change the appearance of a plain plastic pumpkin.
Beginner Ideas
If you’re new to crafting, I’d start with something simple.
Matte Painted Pumpkin

Paint the pumpkin matte white, black, cream, burnt orange, or another fall shade. Add a contrasting stem and finish with a clear sealer once everything is completely dry.
Ribbon or Twine Pumpkin
Instead of painting, wrap the pumpkin with ribbon or twine and secure it carefully. This gives it texture without requiring much preparation.
Washi Tape Pumpkin
Washi tape can be used to create stripes, geometric patterns, or other simple designs. It’s a particularly easy option when you want a quick makeover.
Sticker Pumpkin
Foam stickers or other seasonal stickers are another easy way to decorate a plain pumpkin without using paint.
Intermediate Ideas
Faux Concrete Pumpkin
For a concrete-inspired look, combine gray paint with baking soda to create a slightly gritty finish. The texture helps hide the smooth plastic surface and gives the pumpkin a more substantial appearance.
Burlap Pumpkin
Cut burlap into strips and attach them around the pumpkin with hot glue. I like this technique when I’m going for a rustic or farmhouse look.
Decoupled Pumpkin
Mod Podge works well for attaching materials such as music sheets, fabric, tissue paper, napkins, or scrapbook paper.
For a simple decoupage makeover:
- Clean the pumpkin.
- Lightly sand the surface.
- Apply a thin layer of Mod Podge to a small area.
- Place your paper or fabric onto the wet surface.
- Smooth out bubbles.
- Brush another thin layer over the material.
- Continue around the pumpkin.
- Finish with additional Mod Podge once everything is dry.
Advanced Ideas
Faux Terra-Cotta Pumpkin

For a terra-cotta-inspired finish, add a thin layer of texture using spackle, then build up shades of terracotta, rust, cream, and brown. Lightly dry-brushing the raised areas can create additional dimension.
Realistic Layered Pumpkin
Instead of using one flat orange color, I like layering muted shades and adding a darker wash into the pumpkin’s grooves. This creates the color variation you see on real gourds.
Stacked Pumpkin Tower

Several pumpkins can be stacked together and decorated with rope, twine, greenery, or other seasonal embellishments to create a larger statement piece.
No-Paint Pumpkin Makeovers
You don’t have to paint plastic pumpkins at all.
These are some of my favorite no-paint options:
- Burlap wrapping
- Satin, velvet, or plaid ribbon
- Jute twine
- Fabric scraps
- Washi tape
These techniques are especially useful when I want a quick project or don’t want to deal with paint and drying time.
These no-paint methods are also great for easy sponge painting and craft activities with younger children.
How to Make a Plastic Pumpkin Look Realistic
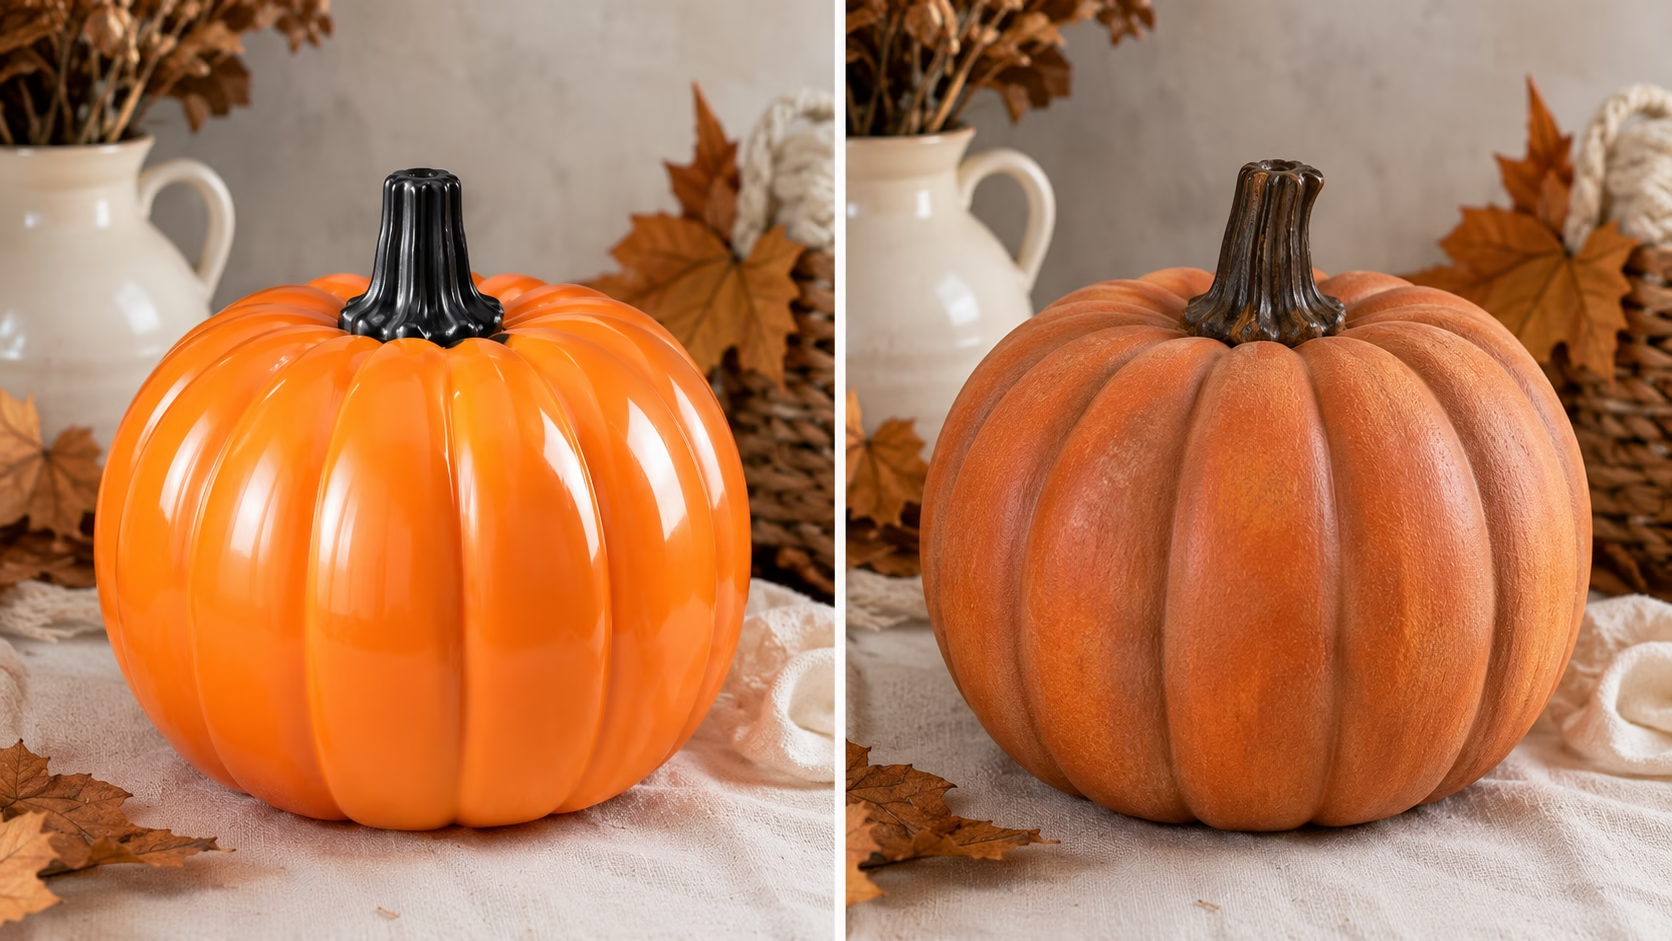
The biggest trick is to get rid of the shiny, perfectly uniform plastic appearance.
Real pumpkins have matte surfaces, texture, color variation, and darker areas in their grooves, so those are the details I try to recreate.
Use a Matte Finish
A matte surface immediately makes a plastic pumpkin look less artificial. Chalk paint or a matte topcoat works well for this.
Add Color Variation
Instead of using one flat orange shade, try layering muted orange, rust, cream, brown, or other complementary colors.
Darken the Grooves
A watered-down darker paint can settle into the pumpkin’s ridges and create more depth.
Add Texture
For terra-cotta and concrete effects, adding a textured material before painting can completely change the appearance.
Don’t Forget the Stem
The stem is a surprisingly important detail. Wrapping it with twine or painting it dark brown and lightly dry-brushing it with a lighter shade can make the entire pumpkin look more realistic.
Finishing Your Pumpkin

Once the makeover is complete, I like giving the pumpkin a little extra protection and making sure all the decorations are securely attached.
How to Seal Painted Plastic Pumpkins
Wait until the paint is completely dry before sealing. A clear matte or gloss spray sealer can help protect the surface from wear and moisture.
For decoupage projects, Mod Podge can work as both the adhesive and the final sealer.
A brush-on product such as Polycrylic is another option when you prefer not to use a spray.
Apply thin coats and allow each coat to dry according to the product instructions.
Best Glue for Decorations
For attaching burlap, ribbon, twine, and small embellishments, hot glue is usually my first choice because it bonds quickly.
For paper and fabric decoupage, I prefer Mod Podge because it works as both an adhesive and a finishing medium.
I wouldn’t rely on super glue for flexible fabric or porous materials because the bond can become brittle.
Frequently Asked Questions
Can I use regular acrylic paint on a plastic pumpkin without primer?
It may stick temporarily, but smooth plastic can cause the paint to peel or chip. I recommend using a plastic-bonding primer first unless your specific paint is designed to adhere directly to plastic.
What’s the easiest plastic pumpkin makeover for beginners?
A simple chalk-painted pumpkin is one of the easiest options. You can also skip paint entirely and use ribbon, twine, stickers, or washi tape.
Will spray paint crack on plastic pumpkins?
Plastic-safe spray paint is designed for this type of surface, but the result still depends on proper preparation and application. Thin coats and following the manufacturer’s instructions are important.
Can I use Mod Podge as both glue and sealer?
Yes. Mod Podge can work as an adhesive, decoupage medium, and sealer.
Can plastic pumpkins be used outdoors?
A properly sealed pumpkin can be used outdoors, but I would still protect it from prolonged rain and harsh weather. Water can eventually work underneath painted edges and decorations.
How do I make a Dollar Tree plastic pumpkin look expensive?
My favorite approach is a matte faux concrete or terra-cotta finish. Neutral colors, subtle texture, realistic color variation, and a carefully finished stem can make a basic plastic pumpkin look much more sophisticated.
How do I store decorated pumpkins after fall?
I would wrap them individually in tissue paper or bubble wrap and store them somewhere cool and dry. Avoid placing heavy decorations directly on top of painted surfaces because they can scratch or damage the finish.
Conclusion
A plastic pumpkin makeover is one of my favorite fall DIY projects because it proves that you don’t need expensive decorations to create something beautiful. A simple plastic pumpkin can become a completely different piece with the right paint, texture, fabric, or embellishments.
If I were starting a new makeover today, I’d first decide on the look I want—matte and rustic, textured concrete, faux terra cotta, decoupage, or completely paint-free. Then I’d gather the supplies, prepare the pumpkin properly, and take my time with the finishing details.
The most important thing I’ve learned is that texture and a thoughtful finish make the biggest difference. Once you remove that shiny plastic appearance and add a little character, even an inexpensive pumpkin can become a decoration you’ll want to bring out year after year.
For more hands-on craft inspiration, check out these awesome DIY crafts to try with your kids — several techniques translate perfectly to pumpkin decorating.


