There’s something absolutely magical about cherry blossoms. Those delicate pink and white petals dancing in the spring breeze create a scene straight out of a dream. But what if I told you that you don’t need a sprawling yard or garden to enjoy these stunning blooms? Growing cherry blossoms in pots is not only possible—it’s incredibly rewarding! Whether you’re working with a small balcony, a cozy patio, or just want to add a touch of springtime elegance to your outdoor space, container-grown cherry trees can bring that breathtaking beauty right to your doorstep.
I’ve spent years experimenting with container gardening, and let me tell you, watching a cherry blossom tree thrive in a pot is one of the most satisfying experiences you can have as a gardener. In this comprehensive guide, I’ll walk you through everything you need to know about growing cherry blossoms in pots—from selecting the right variety to ensuring those gorgeous blooms return year after year.
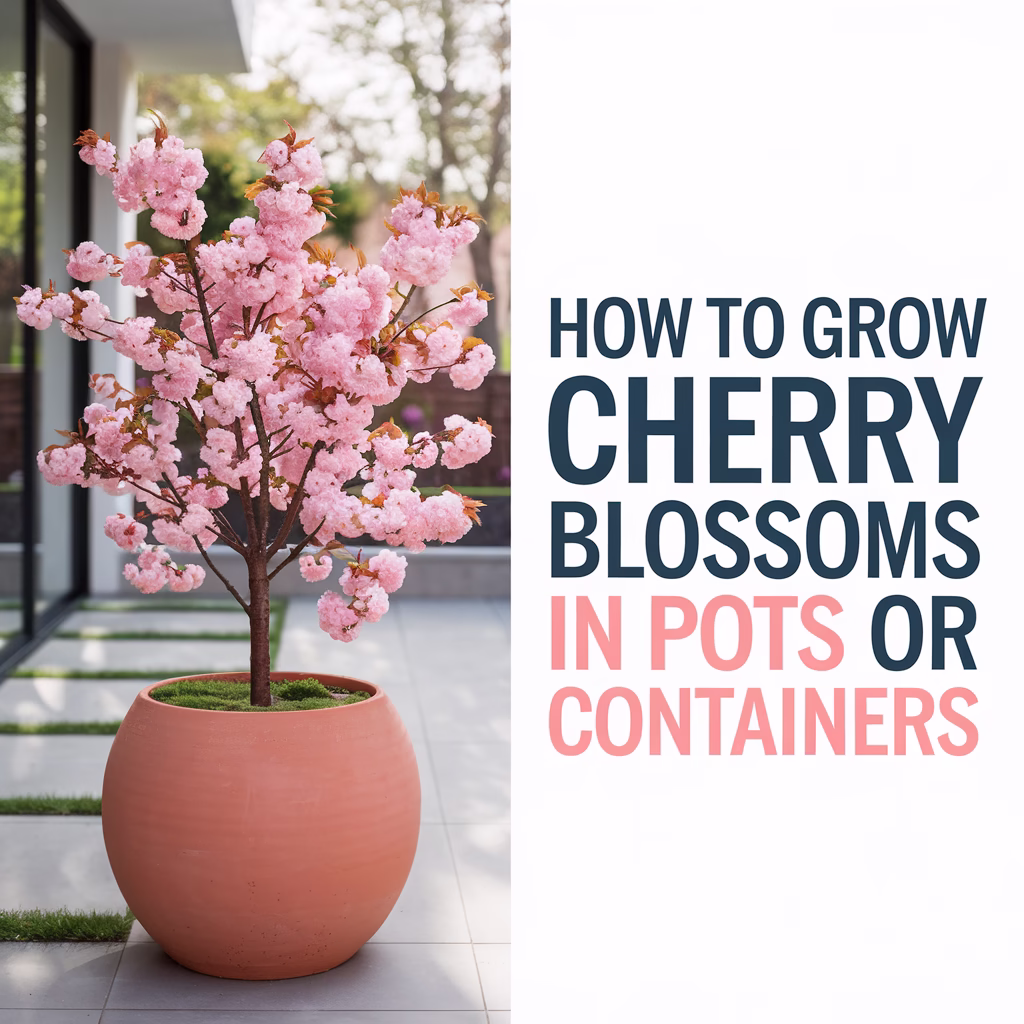
Table of Contents
Key Takeaways
- Choose dwarf or compact varieties specifically bred for container growing, such as ‘Hiromi’ or ‘Snow Fountains’
- Select a large container (at least 15-20 gallons) with excellent drainage to accommodate root growth
- Use well-draining, slightly acidic soil mixed with compost for optimal nutrition
- Provide 6-8 hours of sunlight daily and protect from harsh afternoon sun in hot climates
- Water consistently but avoid waterlogging; container trees need more frequent watering than in-ground trees
Why Grow Cherry Blossoms in Containers?
Before we dive into the how-to, let’s talk about why container growing is such a fantastic option for cherry blossoms.
Space flexibility is the biggest advantage. You can enjoy these spectacular trees even in apartments, condos, or homes with limited yard space. Plus, containers give you the freedom to move your tree to the perfect spot—whether that’s chasing sunlight or protecting it from harsh weather.
Better control over soil conditions is another major benefit. Cherry blossoms prefer slightly acidic soil, and when you’re growing in containers, you have complete control over the soil composition. No need to amend your entire garden bed!
Pest and disease management becomes much easier when your tree is in a pot. You can isolate it if problems arise and monitor its health more closely.
And let’s not forget the aesthetic appeal. A potted cherry blossom tree creates an instant focal point on any patio, deck, or balcony. It’s like having a living sculpture that transforms with the seasons.
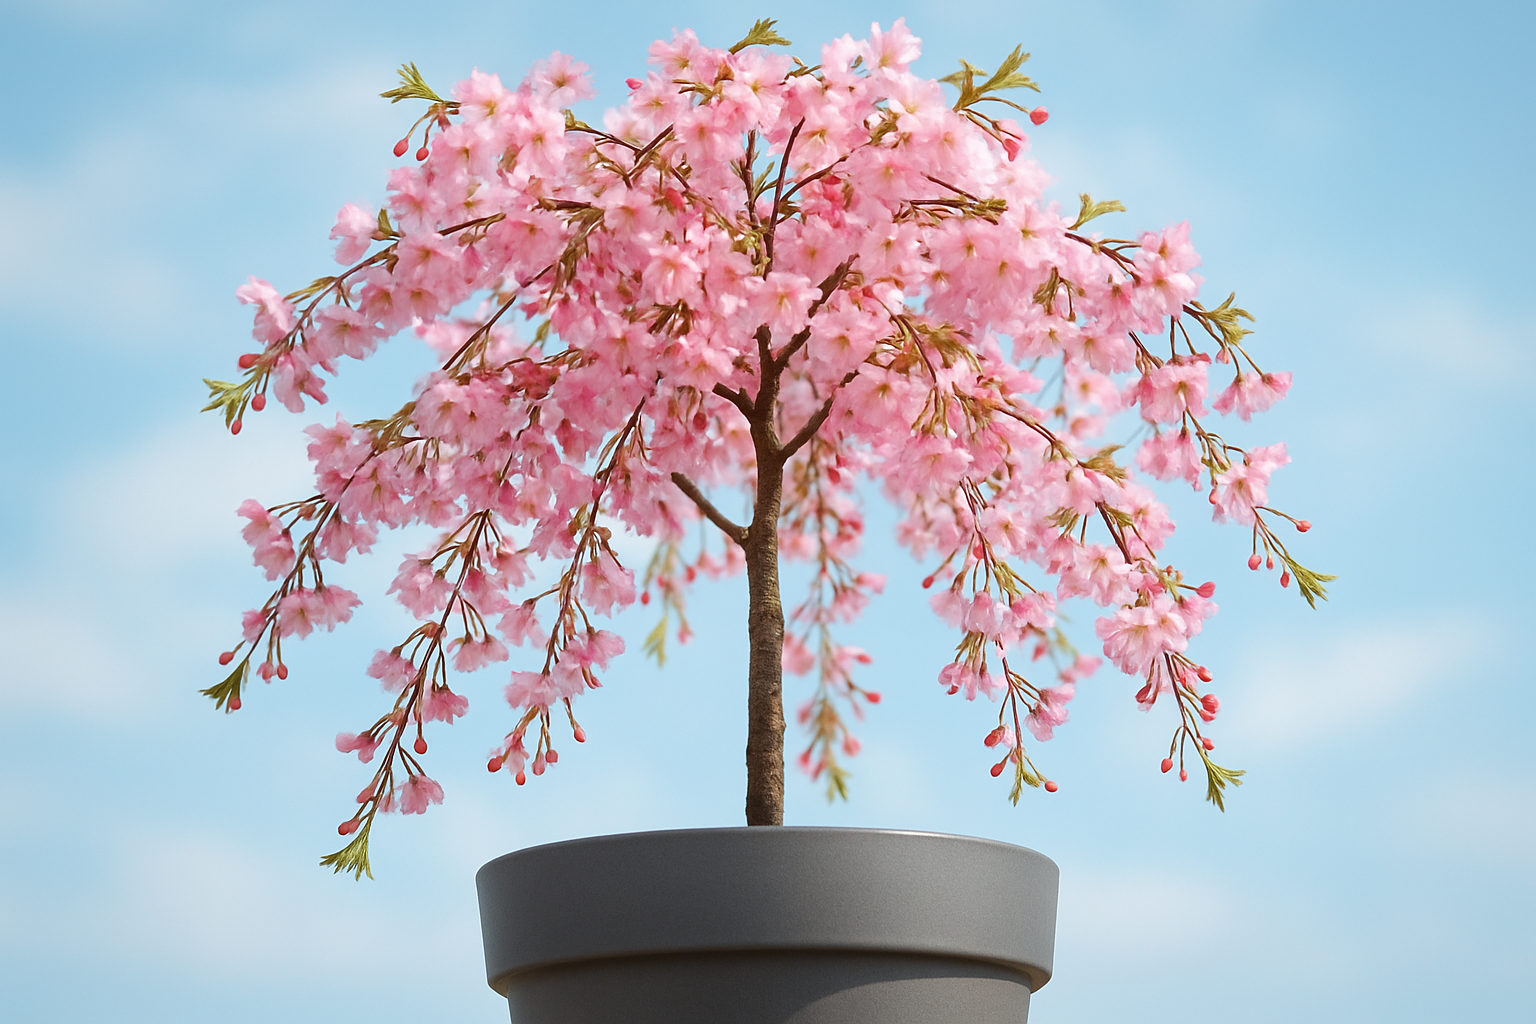
Choosing the Right Cherry Blossom Variety for Container Growing
Not all cherry blossom trees are created equal when it comes to container life. You’ll want to focus on dwarf or naturally compact varieties that won’t outgrow their pots too quickly.
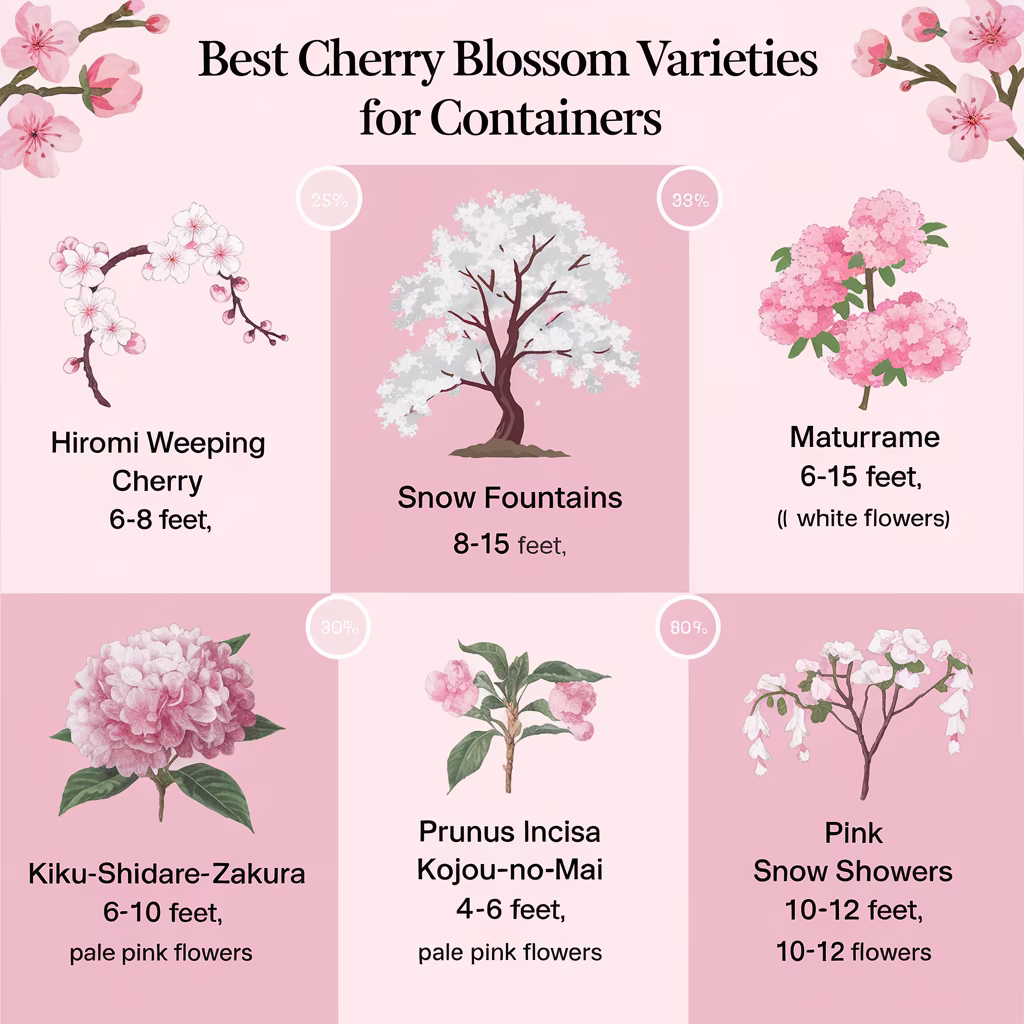
Best Varieties for Pots
Here are my top recommendations for growing cherry blossoms in pots:
| Variety | Height | Flower Color | Special Features |
|———|——–|————–|——————|
| ‘Hiromi’ Weeping Cherry | 6-8 feet | Pink | Cascading branches, very compact |
| ‘Snow Fountains’ | 8-15 feet | White | Weeping habit, cold hardy |
| ‘Kiku-shidare-zakura’ | 6-10 feet | Deep pink | Double flowers, stunning display |
| ‘Prunus incisa Kojou-no-mai’ | 4-6 feet | White to pale pink | Zigzag branches, ultra-compact |
| ‘Pink Snow Showers’ | 10-12 feet | Pink | Weeping form, disease resistant |
I personally love ‘Hiromi’ for beginners—it stays manageable, blooms reliably, and has that gorgeous weeping form that makes cherry blossoms so iconic. If you’re just starting your first garden, this variety is forgiving and rewarding.
Selecting the Perfect Container
The container you choose will make or break your cherry blossom growing experience. Let me share what I’ve learned through trial (and a few errors!).
Size Matters
Start with a container that’s at least 15-20 gallons for a young tree. Cherry blossoms need room for their root systems to develop properly. I recommend going even larger—24-30 gallons—if you plan to keep the tree in the same pot for several years.
As a general rule: the container should be at least 18-24 inches in diameter and 16-20 inches deep.
Material Considerations
Terracotta pots are beautiful and breathable, but they dry out quickly and can crack in freezing temperatures.
Plastic containers are lightweight, affordable, and retain moisture well—perfect for busy gardeners. They’re my go-to for most container projects.
Wooden planters offer excellent insulation and a natural look, though they’ll need replacing every 5-7 years.
Glazed ceramic pots combine beauty with functionality, but make sure they have drainage holes!
Drainage is Non-Negotiable
Your container must have drainage holes—this is absolutely critical. Cherry blossoms hate wet feet, and standing water will quickly lead to root rot. I drill extra holes in the bottom and even a few on the sides near the base for maximum drainage.
The Perfect Soil Mix for Container Cherry Blossoms
Getting your soil right is where the magic happens. Cherry blossoms thrive in well-draining, slightly acidic soil with a pH between 6.0 and 6.5.
My Go-To Soil Recipe
Here’s the mix I use for all my container cherry blossoms:
- 40% high-quality potting soil (never use garden soil—it’s too heavy)
- 30% pine bark fines (for drainage and acidity)
- 20% compost (for nutrients and moisture retention)
- 10% perlite or coarse sand (for extra drainage)
Mix everything thoroughly before filling your container. This combination provides excellent drainage while retaining enough moisture to keep roots happy.
Amendments to Consider
Add bone meal at planting time to encourage root development and future blooms. A handful of mycorrhizal fungi can help establish beneficial root relationships. And a light sprinkling of slow-release fertilizer will give your tree a nutritional head start.
Similar to how you’d prepare soil for other container plants, the key is creating a balance between drainage and nutrition—much like the approach I recommend for raised bed gardens.
Planting Your Cherry Blossom Tree Step-by-Step
Now for the fun part—getting your tree into its new home!
Step 1: Prepare the Container
Place a layer of landscape fabric or mesh screen over the drainage holes to prevent soil from washing out while still allowing water to drain freely.
Add 2-3 inches of your soil mix to the bottom of the container.
Step 2: Prepare the Tree
Gently remove your cherry blossom from its nursery pot. If the roots are circling (root-bound), carefully tease them apart with your fingers. Don’t be afraid to be a bit firm—you want to encourage outward growth.
Step 3: Position and Plant
Place the tree in the center of the container. The top of the root ball should sit about 2 inches below the container rim. This space allows for watering without overflow.
Fill around the root ball with your soil mix, tamping gently as you go to eliminate air pockets. Don’t compact too hard—roots need oxygen!
Step 4: Water Thoroughly
Water deeply until it runs out the drainage holes. This settles the soil and ensures good root-to-soil contact.
Step 5: Mulch
Add a 1-2 inch layer of organic mulch (like shredded bark) on top of the soil, keeping it a few inches away from the trunk. This conserves moisture and regulates soil temperature.
Light Requirements: Finding the Sweet Spot
Cherry blossoms are sun-lovers, but container growing adds some nuance to their light needs.
Aim for 6-8 hours of direct sunlight daily. Morning sun with some afternoon shade is ideal, especially in hot climates. The container will heat up more than ground soil, and intense afternoon sun can stress the roots.
I position my container cherry blossoms where they get full morning light but are shaded during the hottest part of the day. This prevents the soil from overheating while still providing ample light for healthy growth and abundant blooms.
Watch for signs your tree needs more light:
- Sparse blooms
- Leggy, stretched growth
- Pale or yellowing leaves
- Weak, thin branches
Too much intense sun can cause:
- Leaf scorch (brown, crispy edges)
- Rapid soil drying
- Stressed appearance
The beauty of containers is that you can move your tree! If you notice any of these issues, adjust its position accordingly.
Watering Your Potted Cherry Blossom
Watering is probably the most critical—and most misunderstood—aspect of growing cherry blossoms in pots.
The Golden Rule
Water when the top 2-3 inches of soil feel dry to the touch. Stick your finger into the soil to check. Container trees dry out much faster than in-ground trees, especially during hot weather or windy conditions.
Watering Frequency
- Spring and fall: Every 2-4 days, depending on weather
- Summer: Daily, possibly twice daily in extreme heat
- Winter: Once a week or less (dormant trees need much less water)
How to Water Properly
Water slowly and deeply until it runs out the drainage holes. This ensures the entire root ball gets moisture, not just the top layer. I like to water, wait 10 minutes, then water again—this allows the soil to fully absorb moisture.
Pro tip: Set up a saucer under your pot to catch excess water, but empty it after 30 minutes. You want drainage, not standing water.
Container gardening requires more attention to watering than traditional beds, similar to the consistent care needed for maintaining healthy tulips or other container flowers.
Fertilizing for Spectacular Blooms
Cherry blossoms aren’t heavy feeders, but container-grown trees need regular nutrition since they can’t access nutrients beyond their pot.
Fertilizing Schedule
Early spring (just as buds begin to swell): Apply a balanced, slow-release fertilizer (10-10-10 or 14-14-14). This supports new growth and bloom production.
After blooming (late spring): Feed with a bloom-boosting fertilizer higher in phosphorus (like 5-10-5) to encourage next year’s flower buds.
Mid-summer: One more application of balanced fertilizer to support overall health.
Stop fertilizing by late summer—you want your tree to start hardening off for winter, not producing tender new growth.
Fertilizer Types
I prefer slow-release granular fertilizers for ease and consistent feeding. Sprinkle according to package directions on the soil surface and water in thoroughly.
Liquid fertilizers work well too, especially if you’re the hands-on type. Dilute to half-strength and apply every 2-3 weeks during the growing season.
Organic options like fish emulsion, compost tea, or well-aged manure provide gentle, natural nutrition.
“The secret to abundant cherry blossoms isn’t more fertilizer—it’s consistent, balanced nutrition throughout the growing season.”
Pruning and Maintenance Tips
Keeping your potted cherry blossom healthy and beautifully shaped requires some strategic pruning.
When to Prune
Late spring/early summer (right after flowering) is the best time for major pruning. Never prune in fall or winter—this can stimulate new growth that won’t harden off before frost.
What to Prune
- Dead or diseased branches (remove these anytime you spot them)
- Crossing branches that rub against each other
- Suckers growing from the base or rootstock
- Inward-growing branches that crowd the center
- Excessive growth that’s making the tree too large for its container
How to Prune
Use clean, sharp pruning shears. Make cuts at a 45-degree angle just above an outward-facing bud or branch junction. Remove no more than 20-25% of the tree’s canopy in a single year.
For weeping varieties, you can also prune to enhance the cascading form—trim branches to encourage the graceful, flowing shape that makes these trees so stunning.
Additional Maintenance
Deadheading spent blooms isn’t necessary but can tidy up the tree’s appearance.
Monitor for pests like aphids, scale, or spider mites. Treat promptly with insecticidal soap or neem oil.
Check the trunk and branches regularly for signs of disease or damage.
Overwintering Your Container Cherry Blossom
This is where container growing gets tricky. Cherry blossoms need winter chill hours to bloom properly, but roots in containers are much more vulnerable to freezing than in-ground trees.
Cold Hardy Zones
Most cherry blossoms are hardy in zones 5-8, but remember: container roots are exposed to temperatures about two zones colder than the air temperature.
Winter Protection Strategies
For mild climates (zones 7-8):
Move your container to a sheltered location against a south-facing wall. Wrap the container in bubble wrap or burlap for insulation.
For moderate climates (zones 5-6):
Consider moving the tree to an unheated garage, shed, or basement once it goes dormant. It needs to stay cold (32-45°F) but not freeze solid. Water sparingly—just enough to prevent complete dryness.
Alternative method:
Dig a hole in your garden and sink the entire container into the ground for winter. Mulch heavily around it. This provides excellent insulation while allowing the tree to experience necessary chill hours.
For very cold climates:
You may need to bring the tree into a cold but protected space like an unheated garage. Check moisture levels monthly and water lightly if the soil is bone dry.
Much like preparing your fall garden requires planning, successful overwintering starts with preparation before the first hard freeze.
Repotting: When and How
Even with the best care, your cherry blossom will eventually outgrow its container.
Signs It’s Time to Repot
- Roots growing out of drainage holes
- Water running straight through without being absorbed
- Stunted growth despite proper care
- Tree becoming top-heavy and unstable
- Soil drying out extremely quickly
Repotting Schedule
Young trees: Every 2-3 years
Mature trees: Every 4-5 years, or when root-bound
How to Repot
Early spring (before bud break) is the ideal time.
- Water the tree thoroughly a day before repotting
- Carefully remove the tree from its current container
- Gently shake off old soil and trim any circling or damaged roots
- Move to a container 2-4 inches larger in diameter
- Use fresh soil mix and follow the planting steps outlined earlier
- Water deeply and place in a sheltered spot for a week to recover
Root Pruning for Mature Trees
If you want to keep your tree in the same size container, you can root prune instead. Remove the tree, trim off about 20-30% of the roots (focusing on the outer edges), and replant in the same pot with fresh soil. This rejuvenates the tree and controls its size.
Common Problems and Solutions
Even with excellent care, you might encounter some challenges. Here’s how to troubleshoot:
Problem: Few or No Blooms
Causes:
- Insufficient chill hours
- Too much nitrogen fertilizer
- Improper pruning (removing flower buds)
- Tree too young (some take 3-4 years to bloom)
Solutions: Ensure proper winter dormancy, switch to bloom-boosting fertilizer, prune only after flowering, and be patient with young trees.
Problem: Yellowing Leaves
Causes:
- Overwatering or poor drainage
- Nutrient deficiency (especially nitrogen or iron)
- Root problems
Solutions: Check soil moisture and drainage, apply appropriate fertilizer, and inspect roots for rot or damage.
Problem: Leaf Curl or Spots
Causes:
- Fungal diseases (common in humid conditions)
- Bacterial infections
- Pest damage
Solutions: Improve air circulation, avoid overhead watering, remove affected leaves, and apply appropriate fungicide if needed.
Problem: Wilting Despite Moist Soil
Causes:
- Root rot from overwatering
- Container too small
- Extreme heat stress
Solutions: Check roots for rot (they should be white and firm, not brown and mushy), repot if necessary, and provide afternoon shade during heat waves.
Companion Planting in Containers
Want to maximize your container’s beauty? Consider adding companion plants around the base of your cherry blossom.
Best Companions
Spring bulbs like crocuses, dwarf daffodils, or grape hyacinths create a stunning underplanting that blooms alongside your cherry blossoms.
Shade-tolerant perennials such as hostas, heuchera, or ferns work well once the tree leafs out and creates shade.
Trailing annuals like sweet alyssum, lobelia, or calibrachoa can cascade over the container edge for added color.
Just remember to choose plants with similar water and light requirements, and don’t overcrowd the container—your cherry blossom should remain the star of the show!
For more ideas on creating beautiful container combinations, check out these chic tulip decor ideas that can inspire your cherry blossom container designs.
Creating a Container Garden Display
One potted cherry blossom is beautiful, but creating a cohesive container garden display takes things to the next level.
Design Tips
Vary heights: Combine your cherry blossom with lower containers of complementary plants to create visual interest.
Repeat colors: Echo the pink or white blooms with flowers in coordinating containers nearby.
Consider texture: Mix the delicate blossoms with bold foliage plants for contrast.
Use odd numbers: Group containers in threes or fives for the most pleasing aesthetic.
Create a focal point: Position your cherry blossom as the centerpiece, with supporting containers arranged around it.
I love placing my potted cherry blossom on my patio with colorful fall flowers in surrounding pots to extend the season of interest. When the cherry blossoms finish their spring show, the fall bloomers take center stage.
Enjoying the Fruits of Your Labor (Literally!)
While ornamental cherry blossoms are primarily grown for their flowers, some varieties produce small fruits. They’re typically too tart for fresh eating but can be used for jams or left for the birds—who will absolutely love you for it!
If you want edible cherries, consider dwarf sour cherry varieties like ‘Northstar’ or ‘Romeo,’ which can also be grown successfully in containers and offer both spring blooms and summer fruit.
Long-Term Care: Years 3-5 and Beyond
As your cherry blossom matures, your care routine will evolve.
Established trees (3+ years in containers) develop more extensive root systems and become more drought-tolerant—though they still need consistent watering.
Blooms typically increase as the tree matures, with the most spectacular displays occurring between years 5-10.
Size management becomes more important. Regular pruning and occasional root pruning keep the tree at a manageable size for container life.
Soil refreshment helps maintain nutrition. Even if you’re not fully repotting, remove the top 2-3 inches of soil annually and replace with fresh compost-enriched mix.
Think of your container cherry blossom as a long-term investment in beauty. With proper care, these trees can thrive in pots for 15-20 years or more, bringing joy every spring.
Sustainable Container Gardening Practices
As someone who values mindful living, I always try to incorporate sustainable practices into my gardening.
Collect rainwater for watering your cherry blossom—it’s free, chemical-free, and better for the tree than tap water.
Compost your prunings and fallen leaves (unless diseased) to create nutrient-rich soil amendments.
Choose organic fertilizers and pest controls whenever possible to protect beneficial insects and pollinators.
Reuse and repurpose containers rather than buying new ones. That old wine barrel or large ceramic pot can get a second life as a cherry blossom home.
Mulch with natural materials like shredded bark or leaves to conserve water and suppress weeds.
These practices align perfectly with the philosophy of mindful, low-maintenance gardening that I advocate for—especially for busy people who still want beautiful gardens.
Troubleshooting Specific Challenges
Container Becomes Too Heavy to Move
This is a real issue! A large container with moist soil and a mature tree can weigh 100+ pounds.
Solutions:
- Place the container on a wheeled plant caddy from the start
- Position it in its permanent location before planting
- Recruit help for seasonal moves
- Consider lighter materials like fiberglass or resin containers
Tree Outgrows Space Faster Than Expected
Some varieties grow more vigorously than others.
Solutions:
- Increase pruning frequency
- Root prune more aggressively
- Consider transitioning to in-ground planting if possible
- Choose a more compact variety next time
Blooms Don’t Last Long Enough
Cherry blossoms are famously fleeting—typically lasting only 1-2 weeks.
Solutions:
- Plant multiple varieties with staggered bloom times
- Enjoy the ephemeral beauty (it’s part of their charm!)
- Take lots of photos
- Appreciate the beautiful foliage that follows
Beyond Cherry Blossoms: Building Your Container Garden
Once you’ve mastered growing cherry blossoms in pots, you might catch the container gardening bug! The skills you’ve developed translate beautifully to other trees and plants.
Consider expanding your container garden with:
- Dwarf fruit trees (apples, pears, figs)
- Japanese maples for stunning fall color
- Compact conifers for year-round structure
- Herbs for culinary use (check out these best herbs to grow at home)
Your patio or balcony can become a lush, productive garden space that brings joy throughout the seasons. For inspiration on overall design, explore these backyard garden design ideas that incorporate containers beautifully.
Conclusion: Your Cherry Blossom Journey Starts Now
Growing cherry blossoms in pots might seem intimidating at first, but I promise it’s absolutely achievable—even if you’re new to gardening. The key is choosing the right variety, providing a spacious container with excellent drainage, and staying consistent with watering and basic care.
Yes, container-grown cherry blossoms require more attention than in-ground trees. You’ll need to water more frequently, fertilize regularly, and protect roots during winter. But the reward—those breathtaking clouds of pink or white blooms right outside your door—is worth every bit of effort.
Start small if you’re nervous. Choose a compact variety like ‘Hiromi’ or ‘Kojou-no-mai,’ invest in a quality container and soil mix, and learn as you go. Your first spring bloom will be a moment of pure magic that makes you wonder why you didn’t start sooner.
Remember, gardening is a journey, not a destination. Each season teaches you something new about your tree’s preferences and personality. Embrace the learning process, celebrate the successes, and don’t be too hard on yourself when things don’t go perfectly.
The beauty of cherry blossoms has captivated people for centuries. Now it’s your turn to experience that magic in your own space, no matter how small. Here’s to your container gardening success and many springs filled with spectacular blooms!