
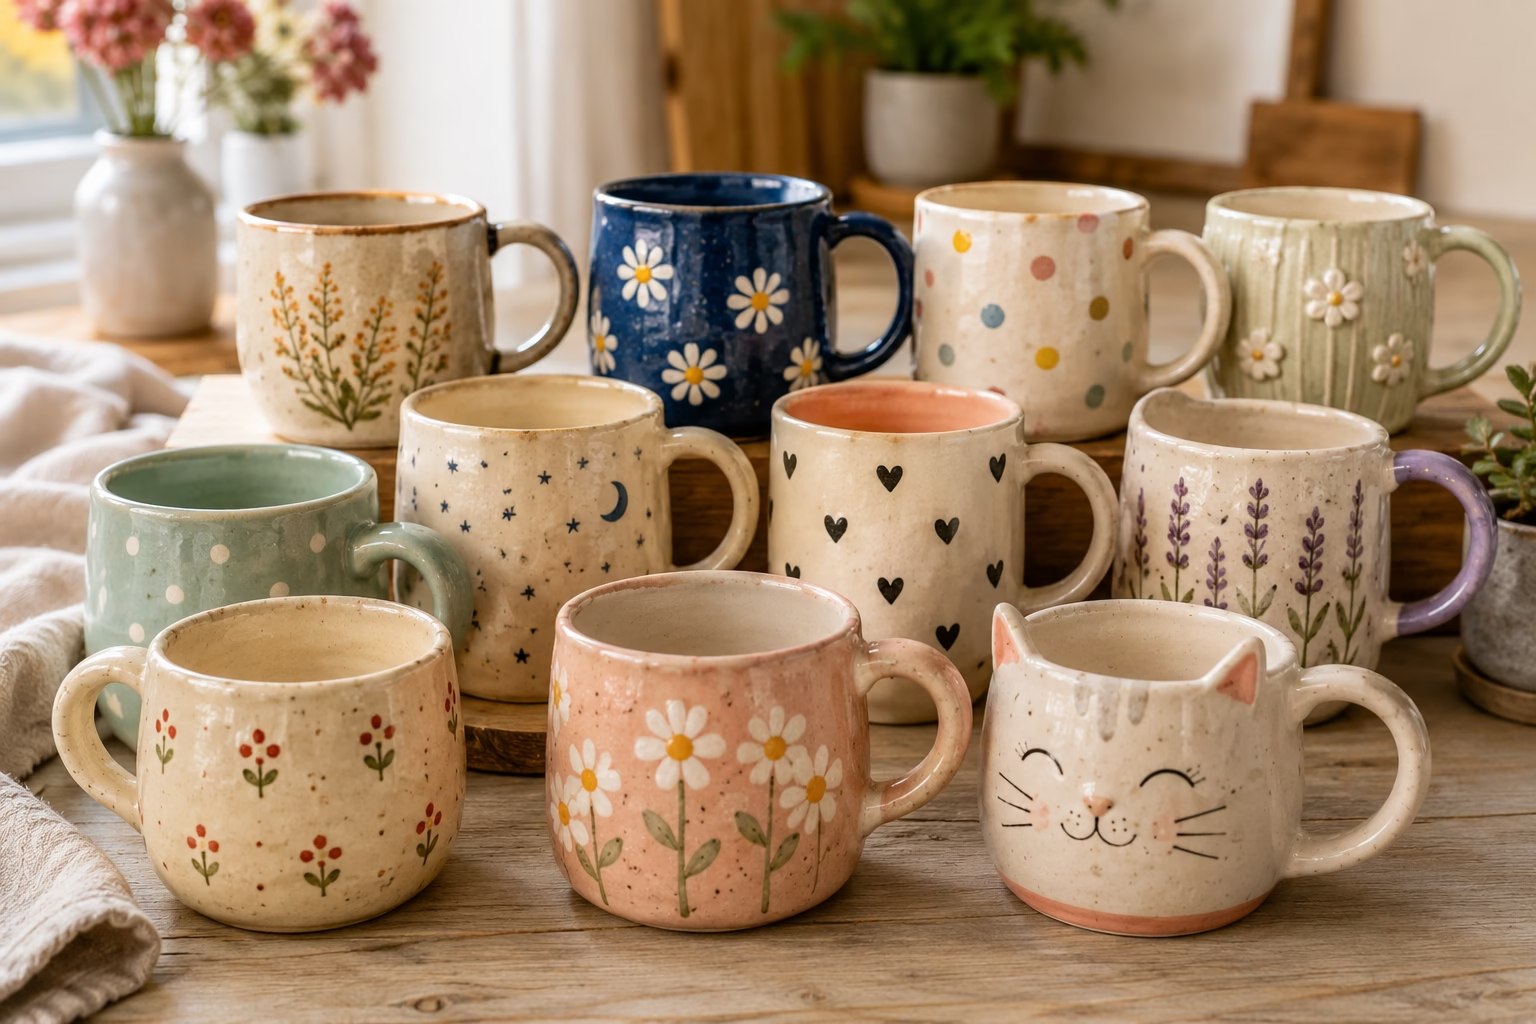
Making your own mug is such a fun way to turn a plain ceramic blank into something that feels completely personal. You can play with color, patterns, lettering, flowers, animals, seasonal themes, or even three-dimensional details.
The ideas in this guide range from very simple painting projects to more advanced sculptural designs. Whether you’re making one for yourself or creating a thoughtful handmade gift, there’s plenty of room to experiment.
If you’re looking for quick inspiration, start with the 10 ideas below and then use the finishing and care tips to help your design last.
Quick Answer: Some of the easiest whimsical handmade mug ideas include dots-and-florals, hand-lettered quotes, animal faces, seasonal designs, and fingerprint patterns. More advanced options include bubble glazing, pressed-flower designs, marbling, mixed-media sparkle, and sculptural 3D mugs.
For mugs that will actually be used for drinks, always check that your paints, glazes, adhesives, and sealers are specifically labeled for the intended food-contact use. The original guide emphasizes that “non-toxic” does not automatically mean food-safe.
Key Takeaways
- Dots-and-florals are presented in the original guide as a defining whimsical mug trend for 2026.
- Hand-lettering, botanical designs, animals, and seasonal themes are easy to personalize.
- Bubble glazing and marbling create distinctive patterns without requiring advanced illustration skills.
- Proper preparation and curing are essential for painted ceramic projects.
- Keep the drinking rim and beverage-contact areas free of materials unless the product is specifically rated for that use.
- Thin layers generally give cleaner results than thick applications.
- Hand-washing can help extend the life of decorative finishes.
- Start with a simple design before moving into resin, clay, or sculptural techniques.
What Makes a Mug Whimsical?

Whimsical mugs don’t need perfect symmetry or detailed artwork. The charm usually comes from playful patterns, unexpected details, organic shapes, and a little imperfection.
Think of:
- Hand-drawn flowers
- Uneven polka dots
- Tiny stars and hearts
- Little animal faces
- Botanical illustrations
- Playful lettering
- Raised or sculptural details
Color can also change the personality of the mug. Pastels, jewel tones, and high-contrast combinations can all work when paired with playful shapes or hand-drawn details.
10 Handmade Mug Ideas
1. Dots-and-Florals Pattern Mug

This is one of the signature whimsical styles featured in the original guide.
Start with a plain white or cream ceramic mug. Use ceramic paint pens or fine brushes to create dots in different sizes. Fill some of the spaces with simple five-petal flowers, leaves, and connecting vines.
Don’t worry about making everything symmetrical. The slightly imperfect hand-drawn quality is part of the charm.
Let each color dry before adding overlapping details, then cure the mug according to your specific product instructions.
2. Bubble Glaze Mug

Bubble glazing creates an abstract, dreamy pattern that can look much more complicated than it actually is.
The original technique uses ceramic glaze combined with a small amount of dish soap and water. Bubbles are blown through the mixture and allowed to overflow onto the mug surface, leaving organic circular patterns.
Try two or three complementary glaze colors for a layered effect.
This technique is especially pretty with soft pastel colors.
3. Hand-Lettered Quote Mug
Choose a short word, phrase, or saying that fits the circumference of the mug.
Lightly sketch the lettering first or use transfer paper if you’re not comfortable drawing freehand. Then fill in the letters with ceramic paint pens and add small details such as stars, hearts, leaves, or dots.
A subtle background pattern can help fill empty areas without competing with the words.
For a personalized gift, this is one of the easiest designs to adapt to a specific person.
4. Marbled Swirl Mug

Marbling creates a different pattern every time, so no two mugs have to look exactly alike.
The original guide uses nail polish dropped onto room-temperature water and swirled with a toothpick before dipping the mug into the surface.
Because this technique has different care requirements from ceramic paint, the original article recommends treating these mugs as hand-wash pieces rather than assuming they are dishwasher-safe.
5. Animal Character Mug

Turn the shape of the mug into a cute animal face.
Try:
- Cat
- Bunny
- Bear
- Puppy
- Fox
Keep the features simple. Two eyes, a small nose, whiskers, and a curved smile can create a surprisingly expressive character without requiring advanced drawing skills.
For extra dimension, the original guide suggests adding separately prepared polymer-clay elements such as ears or noses.
If you enjoy playful home projects, you can also find more inspiration in these DIY home decor ideas.
6. Botanical Pressed-Flower Mug
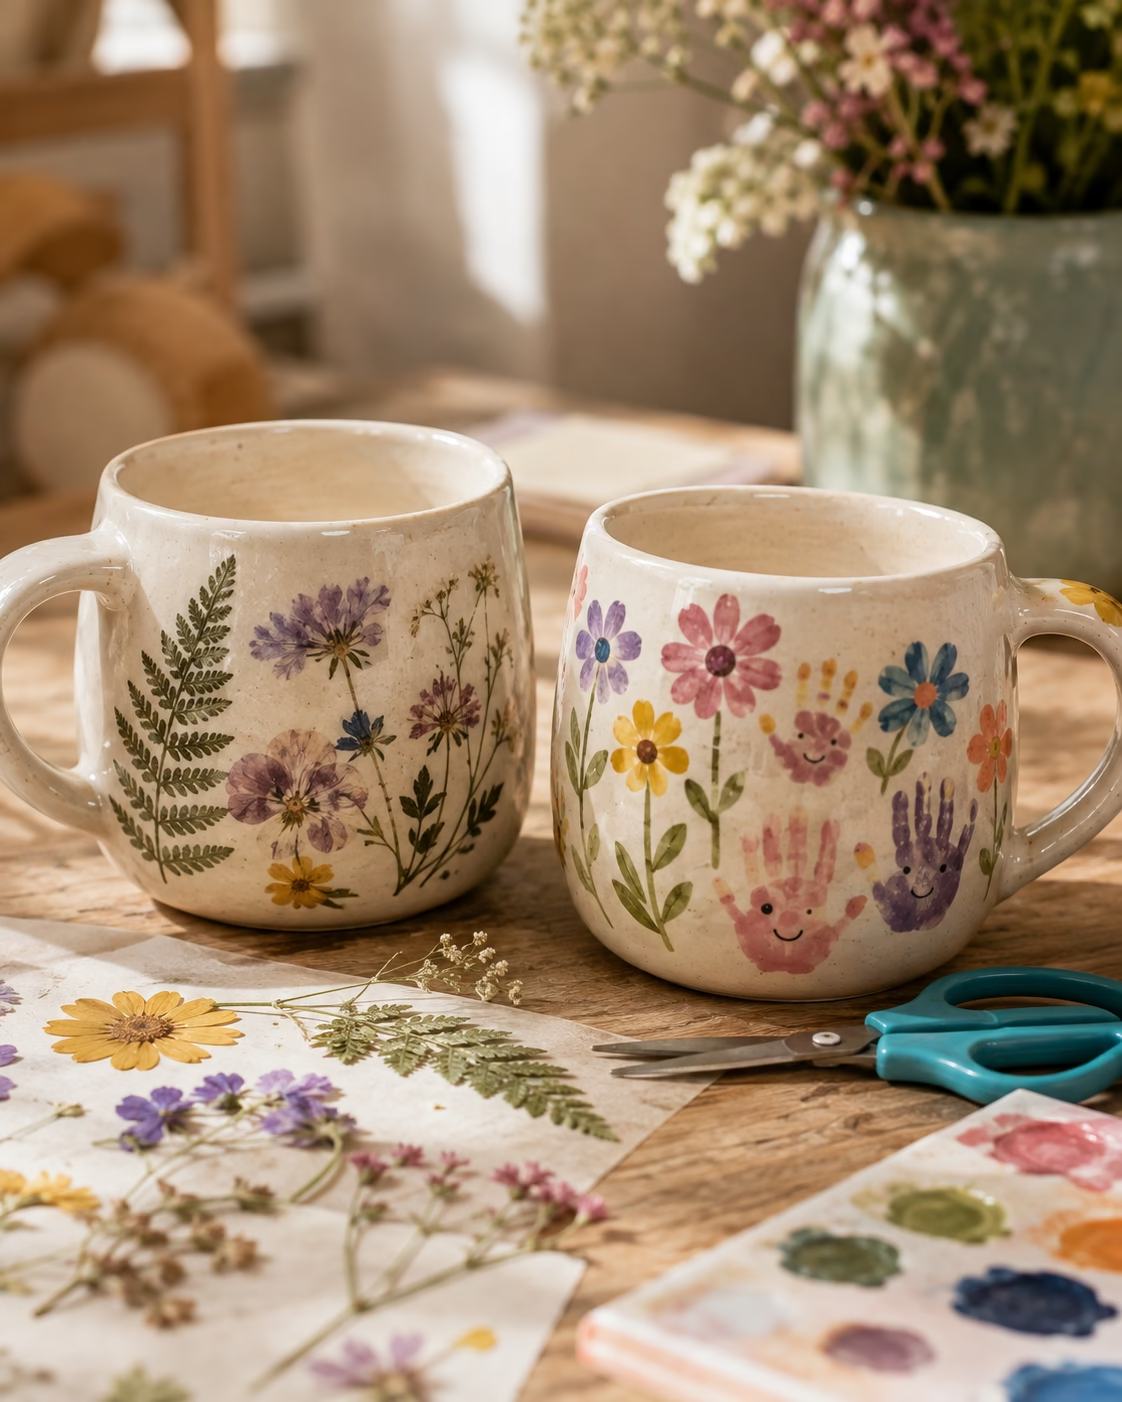
Pressed flowers can give a mug a delicate little-garden appearance.
Arrange flat pressed flowers and leaves on the exterior surface and secure them carefully before applying the appropriate clear coating or resin system.
Flat flowers such as pansies, forget-me-nots, and fern fronds work well because they don’t create as much bulk.
The original guide recommends building multiple thin resin layers to create depth.
For any resin or adhesive used on a functional mug, follow the manufacturer’s specific food-contact and curing instructions rather than assuming a product is suitable simply because it is clear or labeled non-toxic.
7. Fingerprint or Handprint Mug
This is one of my favorite ideas for a meaningful handmade gift.
Use ceramic paint to turn fingerprints into tiny bugs, flowers, balloons, or other shapes. For a handprint mug, you can turn the fingers into little characters or decorations.
It’s especially sweet for children making a keepsake for a parent or grandparent.
The original guide specifically connects this idea with unique Father’s Day gift ideas.
8. Seasonal Theme Mug

Create a mug collection that changes throughout the year.
For example:
Spring: pastel flowers, bunnies, and tulips
Summer: watermelon, sunshine, and beach motifs
Fall: pumpkins, leaves, and warm colors
Winter: snowflakes, mittens, and hot cocoa designs
You can keep the illustrations very simple. The goal is to capture the theme without needing detailed artwork.
Creating a set of four seasonal mugs can also make a fun coordinated collection.
9. Mixed-Media Sparkle Mug
Add extra personality with metallic paint, vinyl shapes, glitter effects, or other decorative details.
Stars, moons, hearts, and geometric shapes work particularly well.
Gold and rose-gold accents can create a more elegant whimsical look, while silver or holographic details can feel more playful.
The original guide recommends sealing sparkle designs carefully to help prevent glitter from coming loose.
10. Sculptural 3D Mug
If you’re ready for a more advanced project, try adding dimensional elements such as flowers, mushrooms, or fantasy creatures.
Polymer clay can be shaped separately and then attached according to the manufacturer’s instructions. Another approach mentioned in the original guide is building ceramic slip or clay forms directly onto appropriate bisque-fired pottery before final glazing.
These mugs take more time and skill, but they can become genuine statement pieces.
Materials and Tools You’ll Need
Your supplies will depend on the design, but most projects start with a few basics:
- Plain white ceramic mugs or appropriate bisque-fired pottery
- Ceramic paints or paint pens
- Brushes
- Transfer paper for lettering
- Toothpicks for small details
- Appropriate food-contact-rated sealers where required
- Suitable adhesives or resin for dimensional projects
- Disposable containers for marbling
- Optional glitter, vinyl, polymer clay, pressed flowers, or other decorative materials
The most important point is to check every product label. A paint or sealer being labeled “non-toxic” does not automatically mean it is suitable for a surface that comes into contact with beverages.
How to Make a Handmade Mug

While each technique is different, most painted mug projects follow the same basic preparation and finishing process.
1. Clean the Mug
Wash the mug thoroughly and remove oils and residue. The original guide recommends cleaning the surface with rubbing alcohol before painting to improve adhesion.
2. Plan Your Design
Sketch lightly with a pencil or use transfer paper for lettering.
3. Apply the Base Colors
Work from lighter colors to darker ones and allow each layer to dry before adding the next.
4. Add Details
Add outlines, dots, lettering, flowers, faces, or other small details after the base layers are dry.
5. Cure Properly
Follow the exact curing instructions provided by the paint, glaze, or other product you’re using.
The original guide gives 24 hours of air drying followed by oven baking at 300–350°F for about 30 minutes as an example for certain products, but you should always follow the instructions for your specific material.
6. Finish According to the Product Instructions
If your design requires a food-contact-rated sealer, apply it in thin, even coats and allow each layer to cure fully.
Tips for Making Your Mug Last
A beautiful design isn’t much use if it starts peeling after a few washes.
Keep the Drinking Edge Clear
The original guide recommends leaving the top half-inch of the mug’s interior and the drinking edge free of paint unless the product is specifically rated for that type of food contact.
Use Thin Layers
Several thin layers are generally better than one thick layer. Thick paint can crack as it dries or cures.
Test Before Making a Full Set
If you’re trying a new product, test it on a spare mug or ceramic tile first.
Don’t Rush Curing
Follow the manufacturer’s timing exactly. A mug that looks dry on the surface may not be fully cured.
Hand-Wash When Possible
Even when a product is labeled dishwasher-safe, the original guide recommends hand-washing when possible because it can help decorative finishes last longer.
Common Mistakes to Avoid
Most mug-making problems come down to a few simple issues.
Skipping surface preparation: Oils and residue can prevent paint from adhering properly.
Using the wrong materials: Don’t assume ordinary craft paint is suitable for a mug that will hold beverages.
Painting the drinking edge: Keep the area that touches your lips clear unless your specific product is rated for that use.
Rushing the curing process: Give the design the full curing time recommended by the manufacturer.
Applying paint too thickly: Thick layers can crack or become uneven.
Overworking wet paint: Let each layer dry before trying to correct or add details.
Care and Storage
Once your mug is finished, a little extra care can help protect the design.
- Hand-wash with mild soap when possible.
- Use a soft sponge rather than abrasive scrubbers.
- If the mug is dishwasher-safe according to the product instructions, place it on the top rack.
- Keep metallic-decorated mugs away from the microwave unless the manufacturer specifically says they are microwave-safe.
- Store handmade mugs with enough space between them to prevent chips.
- Don’t stack them directly on top of one another if the finish is delicate.
- Inspect regularly for chips or cracks and discontinue use if the functional surface becomes damaged.
Easy Ways to Personalize Your Mug
Once you’ve mastered one design, you can create dozens of variations without learning an entirely new technique.
Try:
- Changing the color palette
- Making the design monochromatic
- Mixing matte and glossy finishes
- Using different mug sizes
- Adding a name or initials
- Combining two design styles
- Creating seasonal collections
For example, you could combine botanical flowers + hand-lettering, animal faces + seasonal colors, or dots + florals + metallic accents.
The original guide also recommends experimenting with oversized mugs, espresso cups, and other ceramic shapes.
Frequently Asked Questions
Can I use regular acrylic paint on mugs?
The original guide says regular acrylic paint is not suitable for functional mug surfaces and recommends ceramic paint or a product specifically formulated for dishware. Always follow the product’s own food-contact and curing instructions.
How do I fix a painting mistake?
If the paint is still wet, wipe it away carefully. For dried paint, the original guide suggests using rubbing alcohol on a cotton swab for small corrections before the design is cured.
Can handmade mugs hold hot drinks?
The original guide says properly cured and sealed mugs can be used for hot liquids, but this depends on the materials and instructions for the specific products used. Always follow those instructions rather than assuming every decorated mug is suitable for hot beverages.
Can I paint inside the mug?
Only use a product specifically rated for the interior food-contact surface. The original guide recommends leaving the interior unpainted for most projects.
Conclusion

These whimsical handmade mug ideas give you plenty of ways to turn an ordinary ceramic mug into something personal and playful.
If you’re new to mug decorating, I’d start with a hand-lettered quote, animal face, dots-and-florals pattern, or fingerprint design. They’re relatively approachable and give you a chance to get comfortable with painting and curing.
Once you’re confident, experiment with marbling, botanical designs, sparkle effects, or sculptural details.
The beauty of whimsical design is that it doesn’t have to be perfect. A slightly uneven flower, playful dots, or hand-drawn lettering can make the finished mug feel more special because it clearly came from your hands.
If you’re looking for another family-friendly creative project, check out our summer crafts and DIY ideas for kids.
Pick a blank mug, choose a design that makes you smile, and start creating.


