
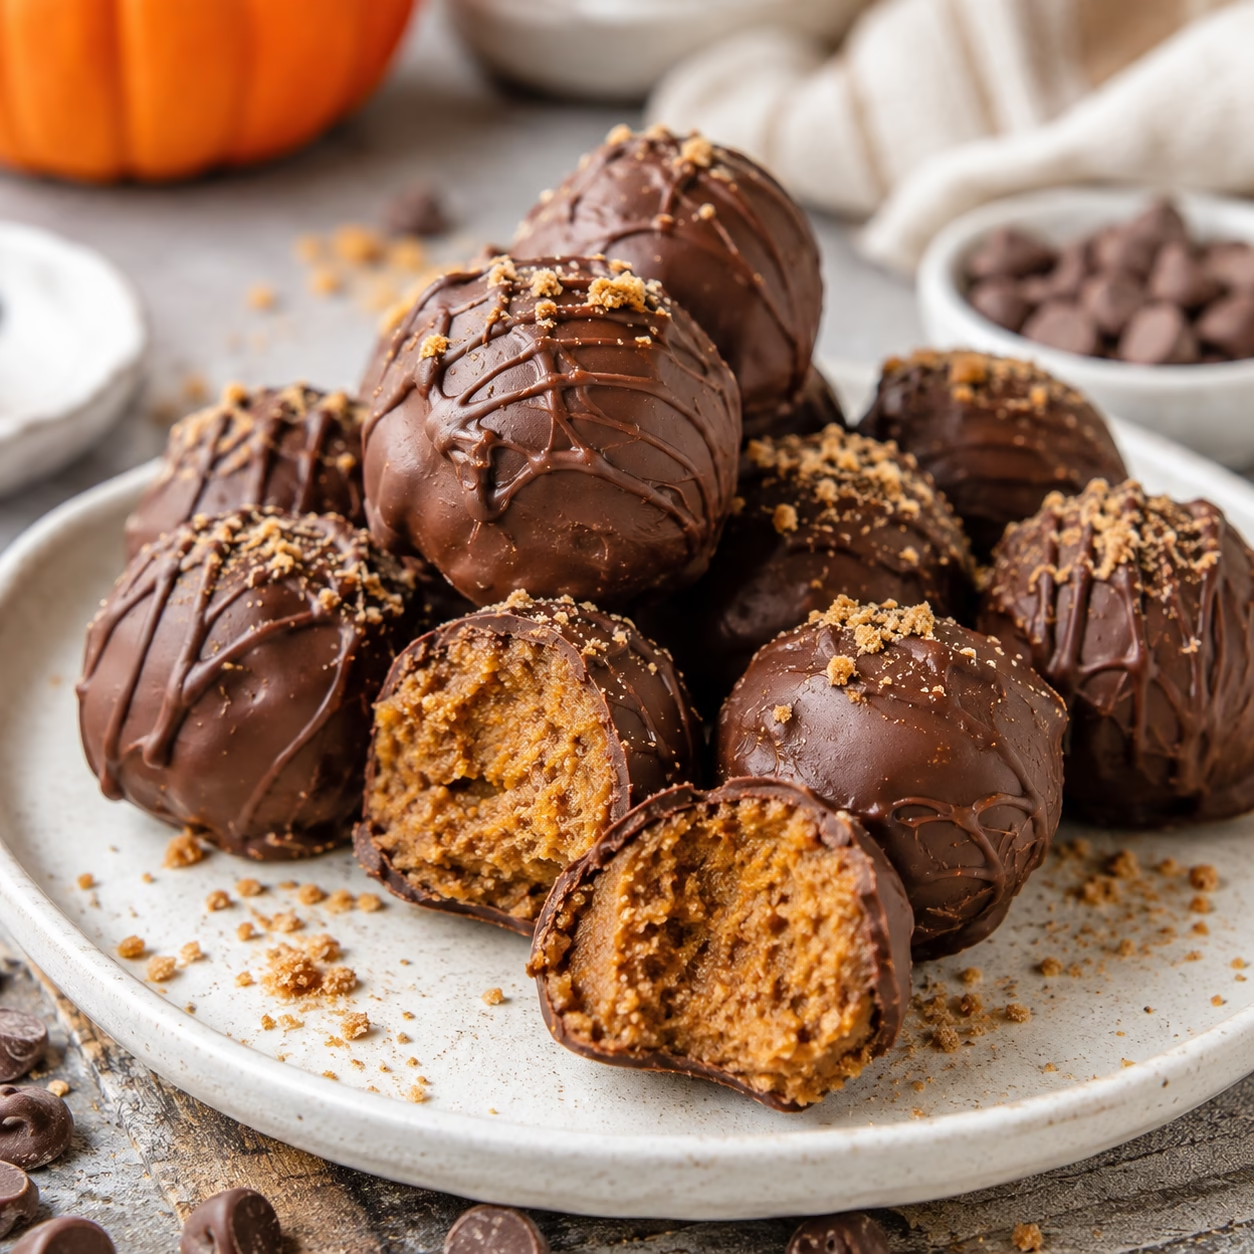
Quick Answer: Healthy pumpkin truffles are bite-sized, no-bake treats made with real pumpkin puree, natural sweeteners, nut butter, almond flour, and warm pumpkin spices. They’re coated in chocolate for a satisfying finish and come together in about 25 minutes of active preparation, plus chilling time.
Unlike traditional truffles made with heavy cream and lots of refined sugar, this version uses pumpkin and other wholesome ingredients while still delivering that cozy pumpkin-spice flavor.
❤️ Why You’ll Love These Healthy Pumpkin Truffles
- No baking required: Everything comes together without turning on the oven.
- Easy to make: The filling takes just a few minutes to mix.
- Full of fall flavor: Pumpkin pie spice, vanilla, and pumpkin create a cozy seasonal treat.
- Naturally gluten-free: The recipe uses almond flour and coconut flour instead of wheat flour.
- Easy to make vegan: Use dairy-free chocolate and plant-based ingredients.
- Make-ahead friendly: Keep them refrigerated for up to 7 days or freeze them for up to 3 months.
- Great for parties: Their small size makes them perfect for holiday dessert tables.
- Easy to customize: Try different nut butters, coatings, or add-ins.
If you love pumpkin spice but want something a little different from the usual muffins, cookies, and pies, these Healthy Pumpkin Truffles are worth making.
They’re small, creamy pumpkin-spiced bites made with pumpkin puree, nut butter, natural sweetener, and flour to create a soft filling. Each one is then coated in chocolate for a simple finish.
The best part? There’s no baking involved. You simply mix the filling, roll it into balls, chill, dip in melted chocolate, and let the coating set.
For more fall inspiration, try our Healthy Pumpkin Spice Truffles Recipe or make our Chocolate Chip Pumpkin Bread for another easy pumpkin treat.
Ingredients You’ll Need

For the Pumpkin Truffle Filling
- ½ cup canned pumpkin puree, drained – Use plain pumpkin puree, not pumpkin pie filling.
- ½ cup cashew butter or almond butter – Creates a creamy base and helps bind the filling.
- 3 tablespoons maple syrup – Adds natural sweetness.
- ½ cup almond flour – Helps absorb moisture and gives the truffles structure.
- 2 tablespoons coconut flour – Helps firm up the mixture.
- 1 teaspoon pumpkin pie spice – Adds classic fall flavor.
- ½ teaspoon vanilla extract – Rounds out the flavor.
- Pinch of salt – Balances the sweetness.
For the Chocolate Coating
- 1 cup dairy-free dark chocolate chips
- 1 teaspoon coconut oil – Helps the chocolate melt smoothly.
Optional Additions
You can also customize the truffles with:
- 2 tablespoons protein powder
- Date paste instead of maple syrup
- Crushed pecans instead of chocolate coating
Ingredient Tips
Pumpkin puree: Canned pumpkin works well because it’s convenient and consistent. Make sure it is plain pumpkin puree, not pumpkin pie filling.
Nut butter: Cashew butter gives the most neutral, creamy flavor, while almond butter adds a more noticeable nutty taste.
Flour: Almond flour and coconut flour help absorb the pumpkin’s moisture and give the mixture enough structure to roll into balls.
Chocolate: Dairy-free dark chocolate with 70% cacao or higher is recommended for a less-sweet coating. Dairy-free white chocolate can be used when you want a sweeter finish.
Important: Drain the pumpkin puree on a paper towel for about 5 minutes before using it. Excess moisture is one of the main reasons pumpkin truffle filling becomes too soft.
Equipment You’ll Need
- Large mixing bowl
- Measuring cups
- Measuring spoons
- Rubber spatula or spoon
- Parchment paper
- Baking sheet or flat tray
- Microwave-safe bowl
- Cookie scoop or tablespoon
- Refrigerator or freezer
How to Make Healthy Pumpkin Truffles

1. Mix the Pumpkin Filling
Add the drained pumpkin puree, cashew or almond butter, maple syrup, and vanilla extract to a bowl. Stir until the mixture is smooth and well combined.
2. Add the Dry Ingredients
Add the almond flour, coconut flour, pumpkin pie spice, and salt. Stir until everything comes together into a soft dough.
3. Adjust the Texture
Check the mixture before rolling. If it feels too sticky to handle, add 1 additional tablespoon of coconut flour and mix again.
4. Roll Into Balls
Roll the mixture into approximately 1-inch balls and place them on a parchment-lined baking sheet. Keeping the truffles small helps them hold their shape and gives you a good balance between the filling and chocolate coating.
5. Freeze the Truffles
Place the tray in the freezer for 30 minutes, or until the truffle centers are firm.
6. Melt the Chocolate
Place the chocolate chips and coconut oil in a microwave-safe bowl. Microwave in 30-second bursts, stirring between each interval, until smooth.
7. Dip the Truffles
Dip each chilled truffle into the melted chocolate. Let the excess chocolate drip off, then place the coated truffle back on the parchment-lined sheet.
8. Chill Until Set
Refrigerate the coated truffles for about 30 minutes, or until the chocolate coating has completely set.
Tips for Perfect Pumpkin Truffles
Drain the Pumpkin Well
This is one of the most important steps. Pumpkin puree contains a lot of moisture, and excess liquid can make the filling too soft to roll. Drain it on paper towels before mixing.
Don’t Skip the Chill
The filling needs to firm up before you dip it in chocolate. Freezing the balls for about 30 minutes makes them much easier to coat.
Melt Chocolate Slowly
Use short microwave bursts rather than heating the chocolate continuously. Overheating can cause the chocolate to seize and become grainy.
Keep the Truffles Small
Aim for about 1 inch in diameter. Smaller truffles are easier to handle and give you a better chocolate-to-filling ratio.
Use Plain Pumpkin Puree
Don’t substitute pumpkin pie filling. It already contains sugar and spices, which can change both the sweetness and texture of the recipe.
Storage & Make-Ahead
Refrigerator
Store the finished truffles in an airtight container in the refrigerator for up to 7 days. Because they contain pumpkin puree, they should stay refrigerated.
Freezer
For longer storage, first arrange the truffles in a single layer on a baking sheet and freeze them. Once firm, transfer them to a freezer-safe bag or container.
They can be frozen for up to 3 months.
Thawing
Let frozen truffles thaw overnight in the refrigerator. Avoid thawing them at room temperature because condensation can cause the chocolate coating to crack or lose its smooth appearance.
You can also make these ahead for a party. The original recipe notes that they can be prepared up to 3 days ahead and kept covered in the refrigerator.
Easy Variations

Protein Pumpkin Truffles
Add 2 tablespoons of unflavored or vanilla protein powder to the filling. You may need a small splash of additional maple syrup if the mixture becomes too dry.
Date-Sweetened Pumpkin Truffles
Replace the maple syrup with date paste for a naturally sweetened variation.
Nut-Coated Pumpkin Truffles
Instead of dipping the truffles in chocolate, roll them in finely crushed pecans or walnuts.
Nut-Free Pumpkin Truffles
Use sunflower seed butter instead of almond or cashew butter. Coconut butter is another option, although it will give the truffles a slightly different flavor.
Vegan Pumpkin Truffles
Use dairy-free cream cheese or another plant-based binder if adapting a cream-cheese version, and choose dairy-free chocolate for the coating. Coconut oil can replace butter.
For another plant-based treat, try our Irresistible Vegan Date Squares.
Gluten-Free Pumpkin Truffles
The recipe as written uses almond flour and coconut flour rather than wheat flour, making it naturally gluten-free. Check packaged ingredients such as chocolate and spice blends for possible cross-contact if you’re preparing them for someone with celiac disease.
For more gluten-friendly fall baking, try our Healthy Zucchini Oatmeal Cookies or Healthy Carrot Zucchini Muffins.
What to Serve With
These pumpkin truffles are small enough to serve alongside other desserts on a fall or holiday dessert table.
Try serving them with:
- Coffee
- Tea
- Hot chocolate
- Fresh fruit
- Other pumpkin desserts
- A selection of cookies and bars
For a bigger fall dessert spread, pair them with our Homemade Pumpkin Roll Recipe or Soft Pumpkin Cookies with Cinnamon Frosting.
FAQ
Can I use fresh pumpkin instead of canned?
Yes. Roast and puree a sugar pumpkin until smooth, then drain it well before using. Fresh pumpkin tends to contain more water than canned pumpkin, so the source recommends draining it for 10–15 minutes on paper towels.
Do pumpkin truffles need to be refrigerated?
Yes. Because the truffles contain pumpkin puree and may contain nut butter or cream cheese, they should be kept cold in an airtight container in the refrigerator.
Can I make these without nut butter?
Yes. Sunflower seed butter works well for a nut-free version. Coconut butter can also be used, although it changes the flavor slightly.
How do I keep the chocolate coating from cracking?
Make sure the centers are cold but not completely frozen solid when you dip them. Very cold centers combined with warm chocolate can cause the coating to crack as it sets.
Are these pumpkin truffles kid-friendly?
Yes. The original recipe describes them as kid-friendly and suggests reducing the spice level slightly and using milk chocolate if you want a sweeter, milder flavor.
Where can I buy pumpkin truffles?
The source mentions seasonal handmade options from Etsy and pumpkin-flavored truffle-style treats from retailers such as Amazon, Thrive Market, and Whole Foods. However, availability varies by season. For a homemade option, our Healthy Pumpkin Spice Truffles Recipe provides a step-by-step recipe.
Conclusion
Healthy pumpkin truffles are an easy, no-bake way to enjoy all the cozy flavors of pumpkin spice without making a complicated dessert. The filling comes together quickly, the truffles can be customized in several ways, and the chocolate coating gives each bite a satisfying finish.
Start with the basic combination of pumpkin puree, nut butter, maple syrup, almond flour, coconut flour, and pumpkin pie spice, then experiment with chocolate coatings, protein powder, dates, or crushed nuts.
For more fall baking inspiration, try our Homemade Pumpkin Roll Recipe or Soft Pumpkin Cookies with Cinnamon Frosting next. Both make great additions to a holiday dessert table.
Healthy Pumpkin Truffles
Equipment
- ½ cup canned pumpkin puree, drained
- ½ cup cashew butter or almond butter
- 3 tablespoons maple syrup
- ½ cup almond flour
- 2 tablespoons coconut flour
- 1 teaspoon pumpkin pie spice
- ½ teaspoon vanilla extract
- Pinch of salt
- 1 cup dairy-free dark chocolate chips
- 1 teaspoon coconut oil
Ingredients
- ½ cup canned pumpkin puree drained
- ½ cup cashew butter or almond butter
- 3 tablespoons maple syrup
- ½ cup almond flour
- 2 tablespoons coconut flour
- 1 teaspoon pumpkin pie spice
- ½ teaspoon vanilla extract
- Pinch of salt
- 1 cup dairy-free dark chocolate chips
- 1 teaspoon coconut oil
Instructions
- Mix the drained pumpkin puree, nut butter, maple syrup, and vanilla extract until smooth.
- Add the almond flour, coconut flour, pumpkin pie spice, and salt. Stir until a soft dough forms.
- If the mixture is too sticky, add another tablespoon of coconut flour.
- Roll the mixture into approximately 1-inch balls and place on a parchment-lined baking sheet.
- Freeze for 30 minutes, until firm.
- Melt the chocolate chips with the coconut oil in 30-second microwave bursts, stirring between each.
- Dip each truffle into the melted chocolate and allow excess chocolate to drip off.
- Return the coated truffles to the parchment-lined sheet.
- Refrigerate for about 30 minutes, until the chocolate has set.
Notes
Use plain pumpkin puree, not pumpkin pie filling.
Keep the truffles around 1 inch in size.
Chill the centers before coating.
Don’t overheat the chocolate.
Store in an airtight container in the refrigerator for up to 7 days.
Freeze for up to 3 months.
For a nut-free version, use sunflower seed butter.
For a protein version, add 2 tablespoons of protein powder.
For a vegan version, use dairy-free chocolate and plant-based ingredients


