
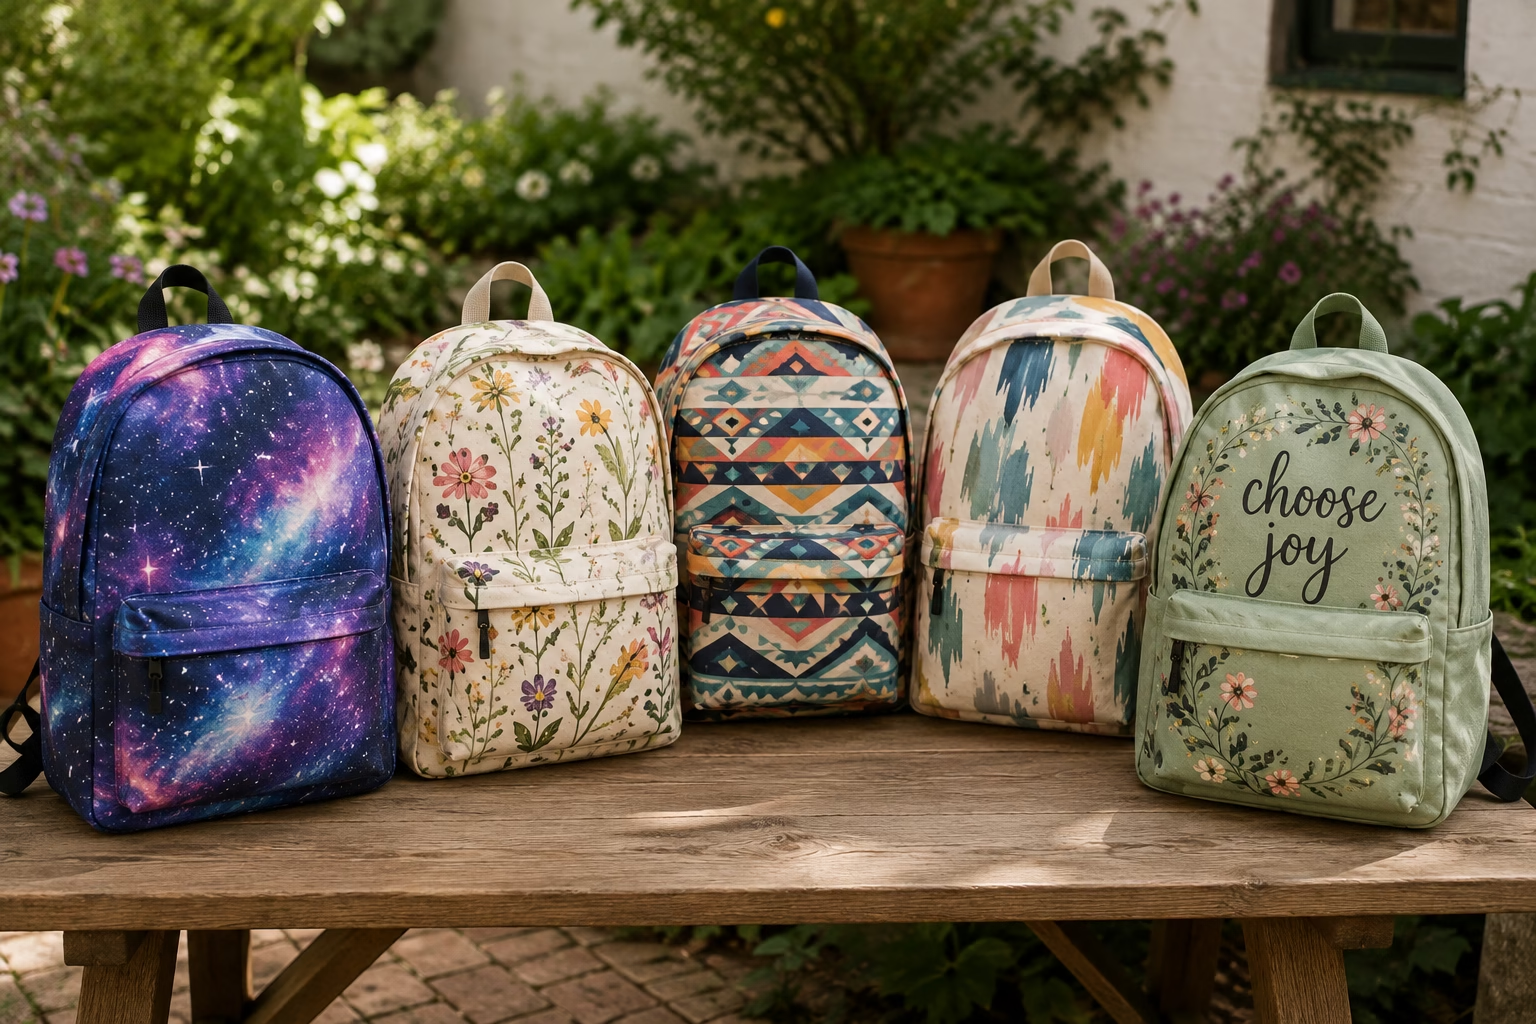
A plain backpack gets you from point A to point B. A painted backpack can tell a little story about you before you even say a word.
From galaxy swirls and botanical designs to bold graffiti, geometric patterns, and personalized names, painting a backpack is an easy way to turn an ordinary bag into something completely your own.
These 13 painted backpack ideas range from simple beginner-friendly designs to more detailed projects for anyone who enjoys spending a little more time on their craft.
Whether you’re refreshing an old backpack or personalizing a new one, you can adapt most of these ideas to suit your favorite colors and style.
Quick Answer: The easiest painted backpack ideas include splatter paint, geometric patterns, personalized names, ombré colors, and simple abstract designs.
More detailed options include galaxy scenes, botanical artwork, mandalas, landscapes, and resin finishes.
For the best results, clean and dry the backpack first, place cardboard inside the compartments to prevent bleed-through, use fabric paint or acrylic paint mixed with fabric medium, and allow each layer to dry completely before adding another.
Key Takeaways
- Canvas, nylon, and polyester backpacks can all be decorated, but preparation varies by material.
- Always put cardboard inside the backpack before painting.
- Fabric paint or acrylic mixed with fabric medium is generally better suited to flexible fabric than ordinary acrylic paint.
- Thin coats are easier to control and less likely to crack.
- Galaxy, botanical, graffiti, geometric, and floral designs offer plenty of room for personalization.
- Let the finished backpack cure completely before using it.
- Sealing the finished design can help protect it from everyday wear.
- Test unfamiliar paint or techniques on scrap fabric or an inconspicuous area first.
What You’ll Need

You don’t need a professional art studio to paint a backpack.
Basic supplies
- Clean canvas, nylon, or polyester backpack
- Thick cardboard
- Fabric paint, acrylic paint with fabric medium, or suitable fabric spray paint
- Small and medium paintbrushes
- Painter’s tape
- Pencil or fabric chalk
- Paper towels
- Water
- Drop cloth or newspaper
Optional supplies
- Fabric markers
- Stencils
- Sponges
- Makeup wedges
- Clear fabric sealer
- Fine-grit sandpaper for suitable slick synthetic surfaces
The original guide recommends gathering everything before beginning so you aren’t stopping halfway through the project to search for supplies.
Before You Paint Your Backpack

A little preparation makes a big difference.
Clean the Backpack
Wash or clean the backpack according to its care instructions and allow it to dry completely. Dirt, oils, and manufacturing residue can interfere with paint adhesion.
Protect the Inside
Place thick cardboard inside the main compartment and any pockets behind the areas you’ll be painting. This prevents paint from soaking through and potentially sticking compartments together.
Protect Straps and Hardware
Use painter’s tape around zippers, buckles, straps, labels, and other areas you don’t want painted.
Test Your Paint
Before committing to the main design, test your paint on scrap fabric or a hidden area.
This is especially important if you’re working with nylon, polyester, spray paint, or a new sealer.
13 Painted Backpack Ideas
1. Galaxy and Space Backpack

Galaxy designs remain one of the most eye-catching options because you can create a surprisingly detailed effect using simple layers of color.
Start with a black or navy backpack. Use a sponge to blend deep blue, purple, and magenta across the fabric while allowing some of the dark background to remain visible.
Once the colors dry, add white stars using a small brush or controlled paint splatter. Finish with a few larger stars, planets, or tiny constellations.
The original guide estimates about 90 minutes of active painting plus overnight drying for this design.
And if you’re putting together a complete outdoor look, this would pair beautifully with our cute hiking outfit ideas and what to pack.
2. Botanical Garden Backpack
Turn your backpack into a miniature garden using leaves, ferns, and flowers as inspiration.
The original technique uses real plant clippings with gesso to create ghost-like botanical impressions on the fabric. After the first layer dries, you can build up additional impressions and paint over them with greens, browns, and accent colors.
Canvas works particularly well for this look because its texture gives the finished design an almost painted-paper quality.
3. Graffiti and Street Art Backpack
For something bolder, try a graffiti-inspired design using stencils, distressed colors, and strong lettering.
The original guide describes creating an aged background before using freezer-paper stencils and fabric paint to produce crisp graphics.
You could use:
- Your name
- A favorite word
- Abstract symbols
- Bold shapes
- Custom lettering
Use several thin coats rather than flooding the stencil with paint.
4. Geometric Backpack
Geometric designs are perfect if you like clean lines and structured patterns.
Try:
- Stripes
- Triangles
- Chevrons
- Hexagons
- Checkerboard patterns
- Abstract blocks
Sketch the design on paper first, then use painter’s tape to create clean sections on the backpack.
Fabric markers can add crisp outlines once the paint has dried.
5. Splatter Paint Backpack

If precise painting isn’t your thing, embrace controlled chaos.
Protect the areas you don’t want painted, thin your fabric paint slightly if appropriate, and flick it across the backpack with a stiff brush or old toothbrush.
Try two or three colors rather than using every color at once.
You can also combine splatter with a solid painted section or stencil for contrast.
The original article suggests an optional chalkboard-style panel where you can write changing messages or names.
6. Personalized Name or Initial Backpack
A personalized backpack is practical as well as decorative.
Create a stencil from your name, initials, or favorite word using cardstock or freezer paper. Secure it to the backpack and apply fabric spray paint or fabric paint in light coats.
If you’re using spray paint, test the distance and pressure on scrap fabric first. Too much paint at once can bleed underneath the stencil.
Remove the stencil while the final coat is slightly wet for the cleanest edges.
7. Ombré Color Gradient Backpack
For a softer, more polished look, blend three to five colors from dark to light.
You might try:
- Navy → turquoise → white
- Purple → pink → yellow
- Forest green → sage → cream
- Burgundy → blush → peach
Work while the colors are still wet so you can blend the transition areas.
The original guide notes that smooth nylon or polyester can work particularly well for this technique.
8. Abstract Expressionist Backpack

This is the perfect choice if you don’t want to follow a strict pattern.
Use broad brushstrokes, overlapping colors, drips, sponges, or other textures. Let some brush marks remain visible rather than trying to make everything perfectly smooth.
You can even use palette knives or crumpled plastic wrap to create texture.
The trick is knowing when to stop. Too much blending can remove the energetic quality that makes abstract designs interesting.
If you’re already exploring DIY home decor ideas, you could use similar colors and artistic patterns on your backpack to coordinate it with your creative style.
9. Mandala Backpack
A mandala creates a more intricate and symmetrical look.
Find the center of the backpack’s main panel and lightly sketch concentric circles. Build the design outward, repeating shapes and patterns around the center.
Small brushes and fabric markers are useful for details, while metallic gold, silver, or copper can add highlights.
The original guide estimates 3–4 hours for a detailed mandala, so this is a good weekend project rather than a quick afternoon craft.
10. Tie-Dye Paint Effect
You can create a tie-dye-inspired backpack without using traditional fabric dye.
Scrunch, twist, or fold the backpack and secure sections with rubber bands. Thin suitable fabric paint and apply different colors to different areas of the bundled fabric.
Once the paint has soaked into the folds, carefully remove the bands and unfold the backpack.
You’ll get an organic pattern that is different every time.
11. High-Gloss Resin Finish
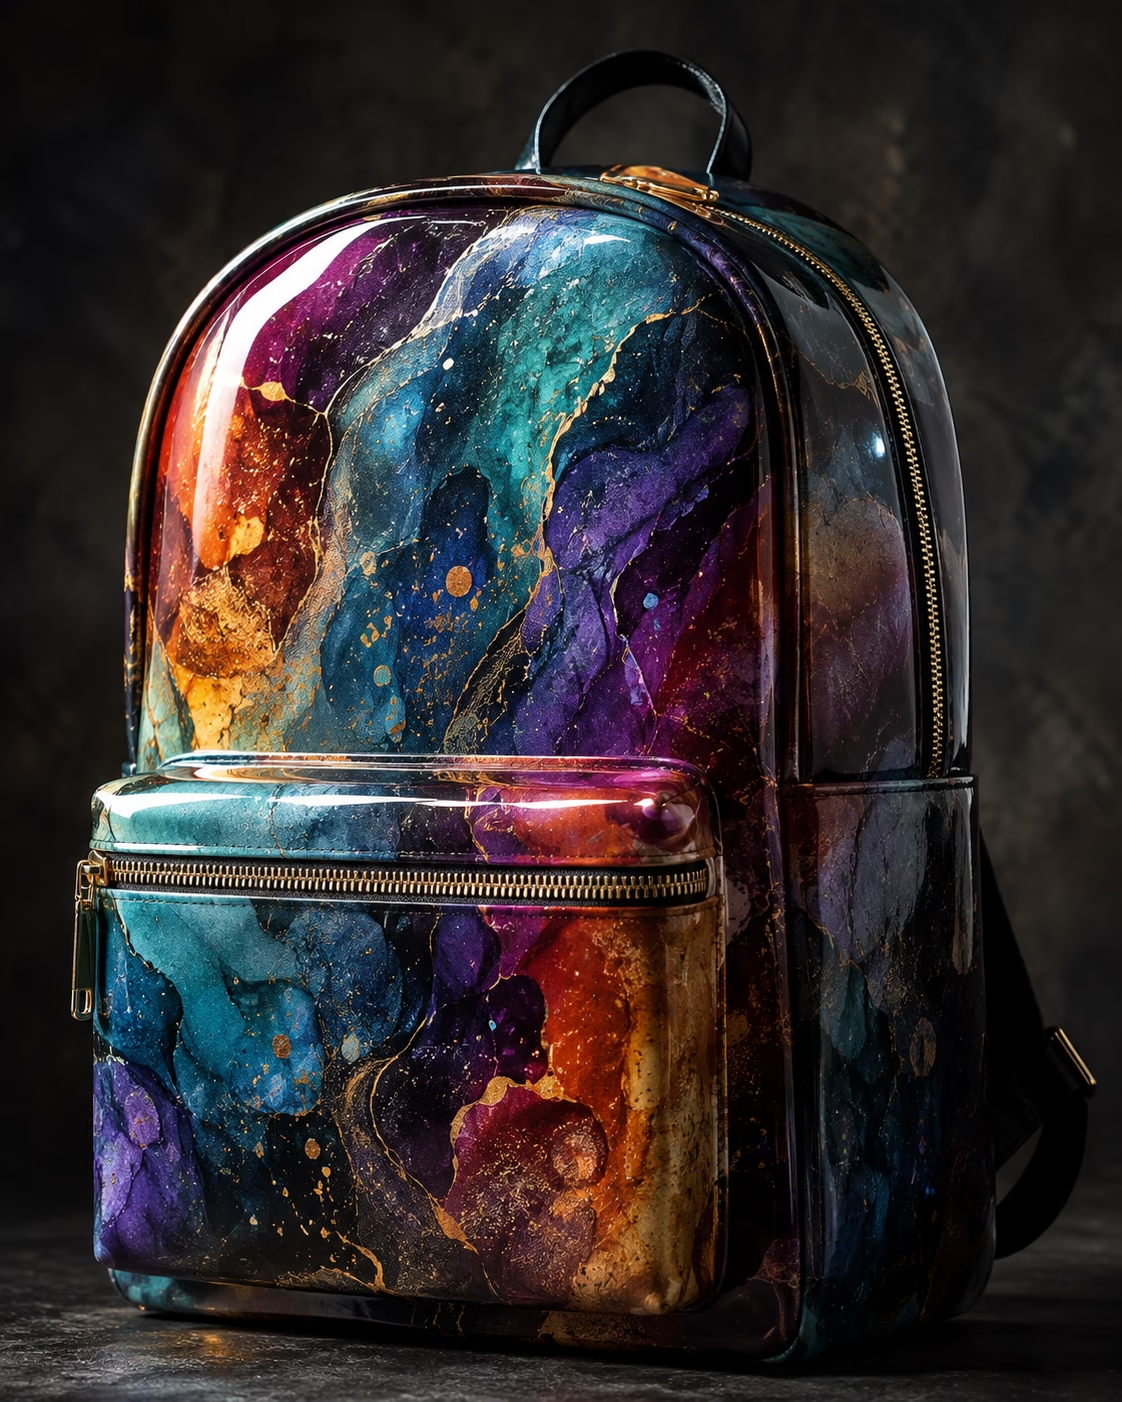
A resin finish can create a dramatic glossy effect, but this is one of the more advanced options.
Start with a fully cured painted design. Apply the appropriate base sealer, then follow the resin manufacturer’s instructions carefully.
The original guide describes using reactive paints and two-part epoxy resin to create a glossy finish that is designed to be highly durable.
Because resin requires careful handling, ventilation, protective equipment, and accurate mixing, this option is best for experienced crafters who are comfortable working with the product.
12. Nature Scene or Landscape

Turn one of the backpack’s main panels into a tiny landscape.
Ideas include:
- Mountains
- Forests
- Beaches
- Lakes
- Sunsets
- City skylines
Sketch the composition lightly, then work from the background toward the foreground. Start with the sky and distant elements before adding larger foreground details.
You don’t need photorealism. A simplified, slightly stylized landscape can look beautiful on fabric.
13. Patchwork and Collage Backpack

Can’t choose just one design?
Don’t.
Divide the backpack into several sections and give each panel a different mini-design—stripes, dots, flowers, stars, lettering, or geometric shapes.
The key to keeping it from looking chaotic is using a consistent color palette across the different sections.
This is also one of the most forgiving approaches because you can repaint one section without having to redo the entire backpack.
Tips for a Backpack That Actually Lasts
Once you’ve chosen your design, these few habits will make a big difference.
Use Thin Layers
Two or three thin coats generally work better than one heavy coat. Thick paint can crack or remain tacky.
Let Each Layer Dry
Don’t rush into the next color. Give each layer enough time to dry according to the product instructions.
Seal the Finished Design
Use a suitable fabric sealer or other product recommended for your specific paint system. This can help protect the design from moisture, friction, and everyday wear.
Don’t Skip the Test
Try your technique on scrap fabric first.
Five minutes of testing can save hours of repainting.
Give It Time to Cure
A backpack can feel dry while the paint underneath is still curing. Follow the product’s recommended curing time before putting it into daily use.
Easy Ways to Customize Your Design
Once you have the basic painting techniques down, you can make the backpack even more personal.
Try:
- Seasonal artwork
- School or team colors
- Glow-in-the-dark details
- Metallic accents
- Iridescent paint
- Fabric patches
- Embroidery
- Studs
- Iron-on transfers
- Collaborative designs with friends
For seasonal changes, you could paint flowers for spring, beach scenes for summer, leaves for fall, or snowflakes for winter.
If you’re planning a group craft day, backpack painting can also fit nicely into your summer bucket list ideas.
If you’re using official team logos or other protected designs on products you plan to sell, check the relevant trademark rules first.
Frequently Asked Questions
What type of paint works best on backpacks?
Fabric paint, acrylic paint mixed with fabric medium, or suitable fabric spray paint are the main options discussed in the original guide. The important thing is choosing a product designed to remain flexible on fabric.
Can I paint a nylon or polyester backpack?
Yes, but slick synthetic materials may need additional preparation. The original guide recommends lightly roughing suitable slick surfaces with fine-grit sandpaper, cleaning them afterward, and using an appropriate base layer.
How do I stop paint from bleeding through?
Place thick cardboard inside the backpack behind every section you’re painting. Replace it if it becomes saturated.
Will a painted backpack survive rain?
Properly cured fabric paint can handle light moisture, but it isn’t necessarily completely waterproof. A suitable waterproof fabric sealer can provide additional protection, especially if the backpack will be used outdoors.
If you’re heading somewhere with a lot of outdoor activity, you might also enjoy these Lake Tahoe outfit ideas.
How long will the painted design last?
The original guide estimates 1–2 years of regular use with proper sealing and care, although high-wear areas such as corners and straps may need touch-ups sooner.
Can I paint leather or vinyl?
Yes, but use products specifically formulated for those materials. Standard fabric paint may not bond properly to smooth leather or vinyl surfaces.
Do I need to heat-set fabric paint?
Not necessarily. Some modern fabric paints are self-setting, while others may require heat. Always follow the instructions on your specific product.
What if I make a mistake?
If the paint is wet, wipe it away quickly. If it has dried, you can repaint the area or incorporate the mistake into the design.
Abstract and splatter styles are especially forgiving because unexpected marks can become part of the finished artwork.
Conclusion
A painted backpack doesn’t have to be complicated to be beautiful.
You can start with something as simple as splatter paint, stripes, a name stencil, or a basic gradient. Once you’re comfortable with the materials, move into galaxy scenes, botanical artwork, mandalas, landscapes, or mixed-media designs.
The most important things are simple: prepare the fabric, protect the inside with cardboard, use an appropriate flexible paint, work in thin layers, and give the finished design enough time to cure.
Then make it yours.
Choose colors you love, add a favorite theme, or combine several techniques into one design. Your finished backpack doesn’t need to look like anyone else’s—and that’s exactly what makes painting one so much fun.
For more outdoor gear inspiration, check out our complete guide on how to choose a backpack.
Grab a backpack, pick your favorite idea, and turn an everyday bag into something that feels completely your own.


